Built-In Closet Safe Installation Guide: What Furniture Manufacturers Need to Consider Before Production
A built-in closet safe is easiest to install well when the safe, cabinetry, and room layout are planned together before production begins. For furniture manufacturers and interior designers, the goal is not only to hide the safe neatly, but to make sure it remains accessible, secure, serviceable, and properly supported for years of daily use. This safe installation guide walks through the production decisions that matter most, from dimensions and clearances to reinforcement, power access, concealment, and coordination with a custom safe manufacturer.
What should be planned before production begins?
Before production starts, manufacturers should confirm the safe model, exact dimensions, door or drawer movement, weight, anchoring method, power needs, and surrounding cabinetry details. A hidden safe installation can fail even when the furniture looks beautiful if the door cannot open fully, the keypad is blocked by trim, the shelf deflects under weight, or the safe cannot be removed for service. Early coordination prevents expensive workshop changes, awkward site modifications, and a final result that feels improvised rather than integrated.The most important principle is simple: design the furniture around the real safe, not around an estimated opening. A custom closet safe may include a swing door, drawers, watch winders, interior lighting, biometric access, electronic locks, or layered security construction. Each feature affects space planning in a different way, so manufacturers need more than a width, height, and depth. They need the safe’s operational footprint.That operational footprint includes what happens when the user opens the safe. A drawer safe may need full forward clearance. A hinged safe door may need side clearance and a comfortable hand position at the lock. A safe hidden behind wardrobe doors may require both sets of doors to clear each other without handles colliding.
Early coordination keeps the safe usable and secure
A built-in safe sits at the intersection of millwork, security, ergonomics, and installation. If one trade works in isolation, problems tend to appear late: a closet island top is already fabricated, a cabinet bay is too shallow, or the finished panels leave no route for power. Furniture manufacturers can avoid these issues by treating the safe as a core component, similar to an integrated appliance.Start by requesting the safe’s technical information before shop drawings are finalized. If the project involves a custom safe manufacturer, ask for a production drawing that shows external dimensions, fixing points, control locations, service panels, cable entry points, and door or drawer travel. If the safe is already selected, verify that the current model details match the document being used. Even small changes in handle projection, lock position, or hinge type can affect the cabinet design.Interior designers should also be involved at this stage because the concealment strategy affects the surrounding finishes. A safe hidden behind a wardrobe panel may call for matching fronts and discreet pull details. A safe inside a dressing island may need a different access height and more careful planning around drawers, seating, and circulation. The more refined the room, the less tolerance there is for last-minute filler panels or visible compromises.
Safe type shapes the cabinet design
Not every safe belongs in the same kind of furniture cavity. The right choice depends on what the client stores, how often they access it, and how discreet the installation needs to be. Manufacturers should understand the basic differences before committing to dimensions.
Common built-in closet safe options include:
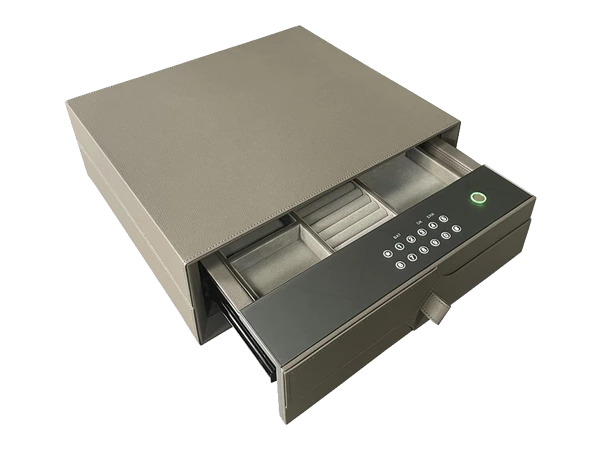
- Jewelry safes: Often designed with internal drawers, soft linings, and compartments. They usually require comfortable standing access and enough forward space for drawers to open fully.
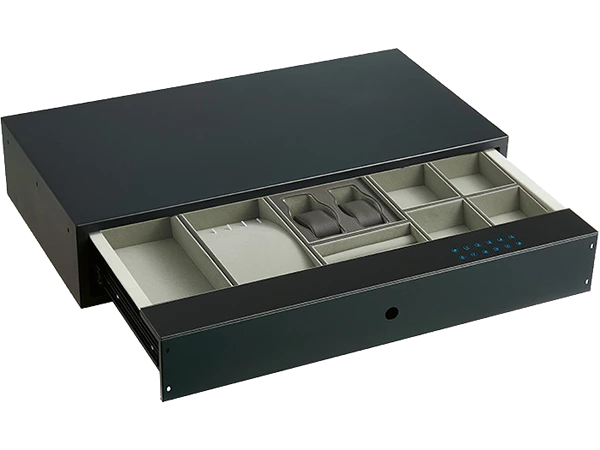
- Drawer safes: Useful for discreet integration inside wardrobes, closet islands, or dressing tables. They need accurate front clearance, side clearance, and support beneath the full drawer travel.
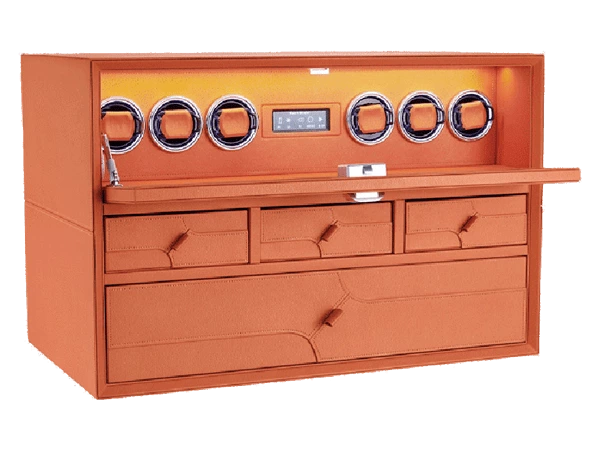
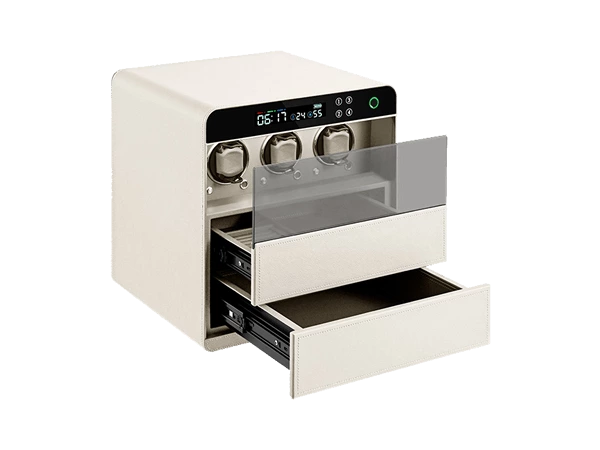
- Watch winder safes: These may require mains power, ventilation consideration, and more depth than a basic safe because of internal mechanisms.
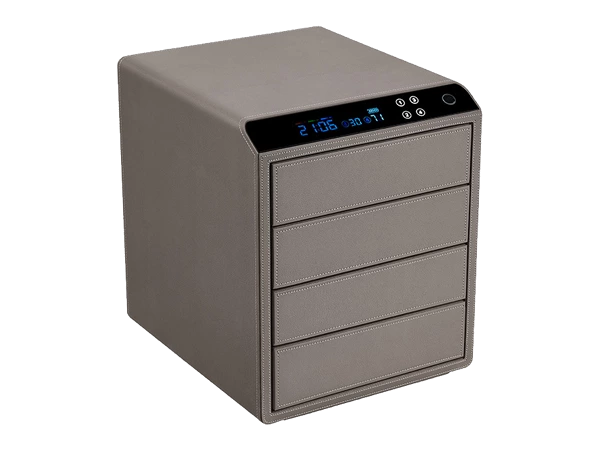
- Freestanding safes built into cabinetry: These can be visually concealed by millwork, but they still need proper anchoring and structural support.
- Wall or floor safes: These may suit some concealed locations, but they require coordination with building structure rather than furniture alone.
A Built-In Closet Safe should be chosen for the way it will actually be used. If the client opens it every morning for watches or jewelry, daily convenience matters. If the safe is for rarely accessed valuables, a more concealed locati0n may be acceptable, even if access takes slightly longer. The furniture design should support that use pattern instead of simply hiding a heavy box wherever space appears available.
Measuring is more than checking width, height, and depth
Basic dimensions are only the beginning. A successful hidden safe installation depends on measuring the safe, the furniture, and the human movement around both. The manufacturer should confirm the outer safe body, any projecting hinges or handles, the lock face, door swing radius, drawer extension, cable routes, and installation tolerance.For example, a jewelry safe with pull-out drawers may fit perfectly inside the cabinet opening when closed, yet become unusable if the wardrobe door, decorative pilaster, or island overhang prevents full extension. A hinged safe door may open, but not far enough for internal drawers to clear. These are not cosmetic flaws. They affect whether the safe can perform its basic function.It is also important to allow realistic tolerance around the safe. Custom furniture is precise, but site conditions, flooring thickness, wall irregularities, and installation methods can change final alignment. A cavity that is designed with no adjustment space may become a problem during fitting. The solution is not to leave large visible gaps, but to plan concealed tolerance zones, removable trims, or serviceable panels where appropriate.
Dimensions manufacturers should confirm
Use a dimension sheet that separates the closed size from the operating size. This helps designers, engineers, and installers understand the true space requirement.
| Measurement | Why it matters |
| External safe width, height, and depth | Defines the minimum cabinet cavity and whether the safe can be moved into position. |
| Door swing or drawer extension | Prevents blocked access after fronts, handles, trims, or adjacent units are installed. |
| Handle, keypad, or biometric reader projection | Ensures the safe face does not clash with concealment panels or cabinet doors. |
| Hinge locati0n and opening angle | Determines side clearance and the usable internal opening. |
| Fixing point locations | Allows reinforcement to be placed exactly where anchoring is needed. |
| Cable entry or battery access position | Keeps electronic functions serviceable without dismantling the furniture. |
| Safe weight, loaded and unloaded if available | Guides structural support, shelf design, and installation handling. |
This table should be part of the project file, not a separate note in an email thread. When dimensions change, the updated information should be shared with everyone responsible for drawings, production, installation, and final inspection.
Structural support cannot be an afterthought
Safes are often much heavier than standard closet contents. Even a compact custom closet safe can place concentrated load on a shelf, drawer base, or cabinet floor. Larger models, multi-layer safes, and watch winder safes can demand a level of support that typical furniture construction was not designed to carry without reinforcement.Manufacturers should avoid relying on thin shelves, unsupported spans, or basic particle board where a safe will sit. A stronger substrate, such as quality plywood, is often a better choice for load-bearing sections. The exact construction should match the safe’s weight, cabinet span, fixing method, and installation environment, but the underlying goal is always the same: transfer the load safely into the cabinet frame, floor, wall, or structural backing.Reinforcement should also consider movement. A heavy safe that sits inside a cabinet but is not properly supported or fixed can shift, rack the furniture, damage finishes, or create security weaknesses. If the safe is pulled open daily, repeated movement can stress joinery over time. Good production planning prevents those forces from being absorbed by decorative components.
Practical reinforcement considerations
For closet cabinetry, manufacturers should review these points before cutting materials:
- Use load-bearing panels where the safe sits. The base should be designed for concentrated weight, not treated like a standard shelf.
- Reduce unsupported spans. Add vertical dividers, plinth support, or internal framing where a safe creates a heavy point load.
- Align fixing points with solid structure. Anchors should connect to suitable backing, not just decorative panels.
- Protect finished surfaces during installation. Heavy safes are difficult to maneuver inside luxury cabinetry, so plan access, lifting, and temporary protection.
- Consider the loaded condition. Jewelry, watches, documents, and accessories add weight, especially when internal drawers are full.
The safest approach is to involve the safe supplier early and ask what support conditions they require. A custom safe manufacturer can usually identify where the unit should be fixed, which surfaces must remain accessible, and what clearances are needed to prevent stress on the safe body or lock face.
How can a safe be hidden without making it difficult to use?
A safe can be hidden behind wardrobe doors, integrated cabinetry fronts, false panels, sliding sections, closet islands, or discreet drawer systems, but the best option balances concealment with daily access. A perfectly hidden safe may be frustrating if the client must remove accessories, open several panels, or bend awkwardly every time they use it. For most closet projects, discreet integration is more practical than theatrical concealment.The right strategy depends on the safe’s purpose. Daily-use jewelry and watch storage should usually sit at a comfortable height, with lighting and clear access. Rarely accessed valuables can be placed in a less obvious position, provided the safe can still be opened fully and serviced. If security is the primary concern, concealment should work alongside anchoring and safe quality, not replace them.A hidden safe installation should also avoid visual clues. Oversized gaps, mismatched panels, unusual handle positions, or a suspiciously blank cabinet section can draw attention. The best concealment feels like a normal part of the closet design. That may mean continuing the wardrobe rhythm, matching veneer grain, using consistent hardware, or placing the safe behind a functional-looking storage zone.
Clearances define the user experience
Clearance planning is where many built-in safe projects succeed or fail. A safe can be structurally supported and visually concealed, yet still feel awkward if the user has to reach around doors or remove stored items to gain access. Manufacturers should test the full sequence of use on paper before production.Imagine the client approaching the closet, opening the outer cabinet, unlocking the safe, opening the safe door, pulling out an internal drawer, and removing a watch or necklace. Every step needs room. If one movement is blocked, the safe becomes a source of daily irritation.For drawer safes, the key issue is forward extension. The drawer should clear wardrobe doors, handles, adjacent drawer fronts, island edges, and any decorative trim. For hinged safes, check the door opening angle and whether internal compartments can be accessed at that angle. For electronic safes, the keypad, biometric reader, or emergency override should be visible and reachable without contortion.
A simple clearance review
Before production, walk through this checklist:
- Can the outer closet door or panel open completely? Partial opening may block the safe face or interfere with the user’s stance.
- Can the safe door or drawer move through its full range? Confirm this with all surrounding fronts, trims, and hardware shown in the drawing.
- Can the user reach the lock naturally? Avoid placing controls too low, too high, or behind a projecting cabinet detail.
- Can internal drawers or trays be used when the safe is open? The safe is not truly accessible if its internal storage cannot extend.
- Can the safe be serviced later? Battery compartments, override access, and power connections should not be permanently buried.
This review is especially valuable for luxury closets, where design details often add thickness, projection, and layering. A beautiful frame, handle, or shadow gap may change the safe’s practical clearance.
Power, batteries, and maintenance need accessible routes
Many modern safes rely on electronic locks, interior lighting, watch winders, alarms, or other powered features. That means a built-in design must account for batteries, mains power, cable routing, and future service. These details are easy to ignore in early concept drawings because they are not always visible in the finished design.If the safe uses batteries, the battery compartment must remain accessible. A panel that looks sleek but traps the battery access point behind fixed millwork can turn a routine replacement into a service call. If the safe requires mains power, cable routes should be planned before production so wires are protected, discreet, and reachable where necessary.Watch winder safes deserve particular attention. They may need continuous power and may have internal components that require occasional access. The furniture should not press tightly against areas that need ventilation or service unless the safe maker confirms that the installation is acceptable.Maintenance access should be treated as part of the design, not a compromise. Removable backs, concealed access panels, or planned cable channels can preserve the finished look while allowing practical service. The best solutions are invisible to the client until they are needed.
Anchoring turns furniture integration into real security
Concealment alone does not secure a safe. If a safe can be lifted or pried out with the surrounding furniture, the installation has a weakness. Anchoring connects the safe to a suitable structure and helps the cabinetry perform as part of a secure system rather than a decorative shell.The anchoring method depends on the safe type, locati0n, substrate, and manufacturer guidance. Some safes are designed to bolt through the base, back, or sides. Others may require a specific fixing kit or structural backing. Furniture manufacturers should not assume that standard cabinet screws or ordinary shelf supports are enough.
For production planning, the key is alignment. If the safe’s fixing points land behind hollow space, thin panels, or inaccessible areas, anchoring becomes difficult on site. Reinforcement should be placed where the anchors actually go. Installers also need enough room to use tools without damaging finished cabinetry.Security details should be discussed discreetly and documented carefully. Not every person involved in a project needs full information about concealment or lock systems. However, the people responsible for structure, installation, and service do need enough technical information to do their work correctly.
Production drawings should show the safe as a real component
A safe should not appear in drawings as a vague rectangle labeled “safe by others.” That may be acceptable at concept stage, but it is risky for production. The drawings should show the selected unit’s size, access direction, clearances, fixing locations, cable routes, removable panels, and relationship to surrounding fronts.This is especially important when a custom safe manufacturer and furniture manufacturer are separate companies. Each may make reasonable assumptions that conflict with the other’s work. The safe maker may assume a clear opening. The cabinet maker may assume the safe face can sit behind a decorative panel. The installer may assume there is access from the rear. A coordinated drawing resolves those assumptions before materials are ordered.A good production set should include plan views, elevations, sections, and detail drawings for the safe area. Where concealment panels are used, show how they open or remove. Where power is needed, show routing and access. Where reinforcement is required, identify the material and position clearly enough for the workshop to build it consistently.
Information to exchange before sign-off
Use this coordination checklist before production approval:
- Safe model or custom specification
- External dimensions and operating clearances
- Total weight and expected load locati0n
- Door swing, drawer extension, or internal pull-out details
- Lock, keypad, biometric reader, and handle positions
- Fixing points and recommended anchoring method
- Power, battery, cable, and service access requirements
- Ventilation or clearance requirements, if applicable
- Desired concealment method and finish integration
- Installation sequence and handling access
- Responsibility split between safe supplier, furniture maker, electrician, and installer
This checklist reduces the chance of late-stage surprises. It also gives the client a clearer understanding of what the finished installation will do, not just how it will look.
Common mistakes are preventable with early testing
Most built-in safe problems are not mysterious. They come from designing around assumptions instead of confirmed operating conditions. A safe is measured closed, but used open. It is drawn without its handle projection. It is placed on a standard shelf. It is hidden behind a beautiful panel that cannot be removed once adjacent trim is installed.Another common mistake is placing the safe where it looks symmetrical rather than where it works ergonomically. A low position may conceal the safe well, but make jewelry access uncomfortable. A high position may look tidy in elevation, but create an awkward reach for a heavy door. A corner locati0n may seem discreet, but limit the opening angle.Manufacturers can catch many of these problems with a simple mock-up or movement test. This does not always require a full physical prototype. A detailed drawing review, cardboard clearance model, or workshop trial with the actual hardware dimensions can reveal conflicts before the finished materials are committed.