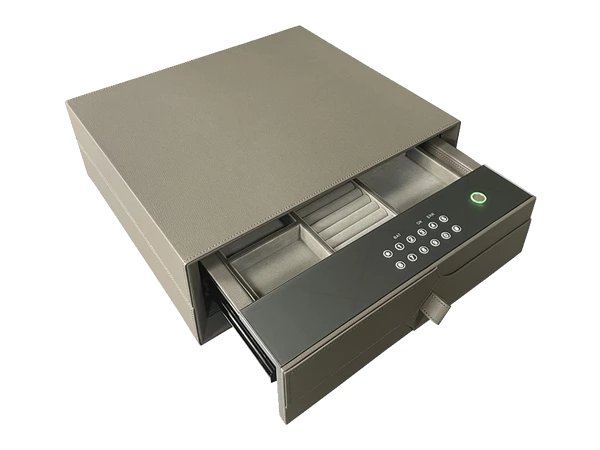
Hidden Safe Installation in a Closet Mounting Anchoring and Bolting Guide
A hidden safe in a closet works best when it is planned as both a security feature and a storage feature. The goal is not simply to tuck a box behind clothing, but to choose a safe location, mount it correctly, anchor it into strong structure, and conceal it in a way that still lets the rightful owner reach it easily. This guide explains the practical choices behind closet hidden safe planning, including wall, cabinet, wardrobe, and floor-adjacent installations.
What is the best way to install a safe hidden in a closet?
The best way to install a safe hidden in closet storage is to secure it to structural framing, masonry, concrete, or a reinforced cabinet system, then conceal it behind normal closet elements that do not interfere with the door, lock, hinges, or emergency access. A safe that is only placed on a shelf or set inside a wardrobe is easier to remove, so proper mounting and anchoring matter as much as concealment.A good installation starts with the safe type. A small document safe, a hidden wall safe, a safe hidden in cabinet millwork, and hidden safe lockers in wardrobe systems each need different support. The weight of the safe, the swing of the door, the contents inside, and the wall or cabinet structure all affect the mounting plan.A closet is often a strong candidate for secret storage solutions because it already contains layers of visual cover: clothing, shelves, drawers, shoe racks, panels, trim, and storage bins. However, a closet can also hide weak mounting surfaces. Drywall, thin cabinet backs, particleboard shelves, and decorative panels should never be treated as the main anchor point unless they are reinforced.
Closet locations that work well for hidden safe installation
The right location balances security, access, discretion, and build quality. A closet hidden safe should be easy enough for the owner to use without making the safe obvious to anyone else. It should also be positioned where anchoring can reach studs, blocking, masonry, or a solid floor structure.
Common closet locations include:
- Behind hanging clothes: Useful for a safe hidden in closet framing or a panel-covered wall safe. It offers natural visual cover, but the safe door must open without catching on hangers.
- Inside a wardrobe cabinet: A wardrobe hidden safe can be installed behind a drawer front, false panel, interior shelf, or removable back panel if the cabinet is reinforced.
- Behind shelving: A built in hidden safe can sit behind adjustable shelves, folded clothing, or storage baskets, as long as shelf standards and brackets do not block access.
- Low in the closet: A floor-level safe can be easier to anchor into subfloor, slab, or base framing. It may also be less visible, though bending access should be considered.
- Inside a cabinet or closet island: A safe hidden in cabinet storage can work well when bolted to the cabinet frame and, ideally, to floor or wall structure behind it.
Avoid locations near plumbing lines, electrical panels, HVAC ducts, or exterior walls that may be prone to moisture unless the installation is designed for those conditions. Also avoid mounting a heavy safe above weak shelving or in a position where it could fall if the cabinet fails.

Safe styles for closet and wardrobe concealment
Different safe designs suit different closet layouts. Before cutting, drilling, or ordering cabinetry, match the safe to the structure around it.
Wall safes
A hidden wall safe installation usually places the safe between wall studs or inside a framed opening. This can be a clean option when the safe is shallow enough for the wall cavity and when the wall can be opened without disturbing utilities. Many wall safes are designed for documents, jewelry, small valuables, or backup items rather than large bulky storage.Wall safes must be attached to framing, not just drywall. If the safe is wider than the stud bay, framing may need to be modified by a qualified professional. A hidden wall safe installation also needs a concealment plan, such as a hinged panel, mirror, hanging organizer, or built-in shelving face.
Cabinet and wardrobe safes
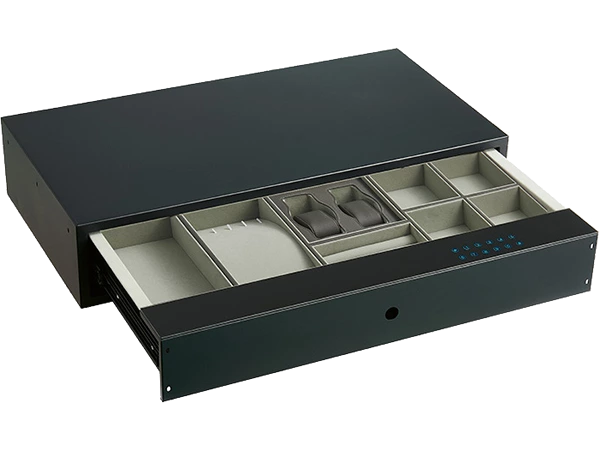
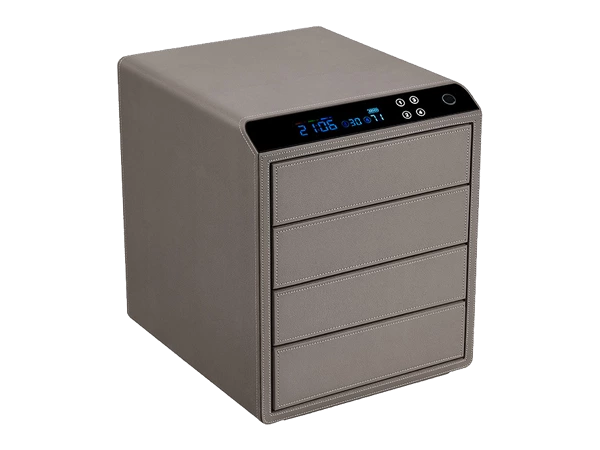
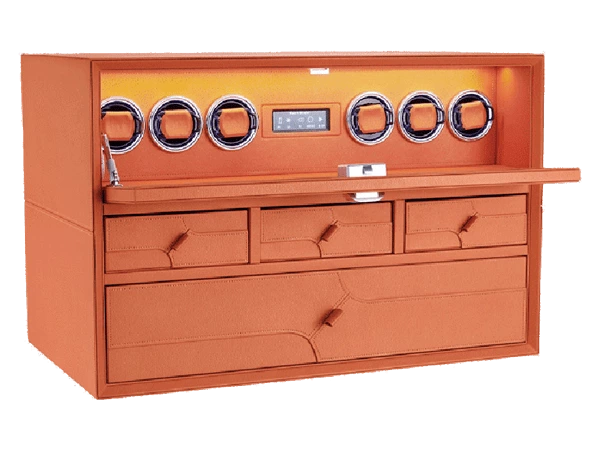
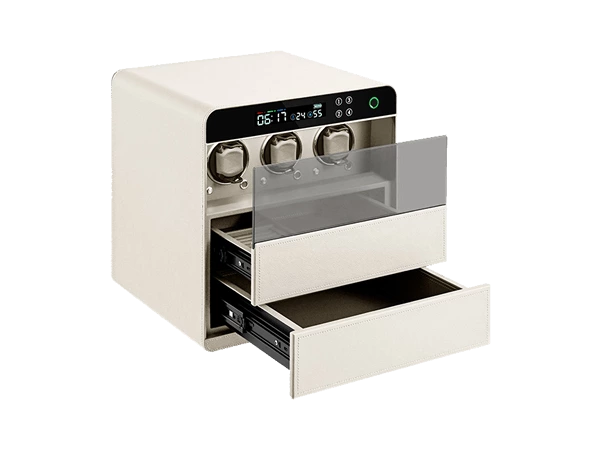
A safe hidden in cabinet or wardrobe furniture can be practical in a reach-in closet, walk-in closet, or custom dressing area. This approach is often less invasive than opening a wall, but the cabinet must be strong enough to resist removal. A thin cabinet back alone is not enough.For a hidden safe in cabinet installations, the safe should be bolted through reinforced panels and, where possible, into wall studs or floor framing. The concealment can be subtle: a removable drawer stack, a false back, a toe-kick panel, or a matching interior door. Hidden safe lockers in wardrobe systems can also be integrated into vertical compartments so they look like ordinary storage divisions.
Floor and base-mounted safes
A base-mounted safe may sit inside the closet on the floor, under built-in shelves, or inside a lower cabinet. This style is often easier to anchor because the fasteners can connect to concrete, wood subfloor, or structural blocking. It can be a good option when the wall cavity is too shallow for a wall safe.The tradeoff is visibility and access. If the safe is too low, it may be inconvenient for frequent use. If it is hidden behind bins or shoes, the cover may become messy and make the safe harder to reach in a hurry.
Built-in concealed compartments
A built in hidden safe can be part of a larger closet renovation. This may include framed blocking, custom cabinet panels, recessed compartments, and integrated lighting that does not reveal the safe. Built-ins are especially useful when the closet design is being planned from scratch.This option allows the installer to prepare proper structure before the finish materials go in. It can also make the concealment feel natural because the safe is not an obvious afterthought. The key is to keep the access method simple and durable so the hidden storage does not become frustrating to use.
Mounting surfaces determine the strength of the installation
The safe is only as secure as the material holding it. A strong lock on a poorly anchored safe does not provide reliable protection. Before installation, identify what is behind the surface and decide whether reinforcement is needed.
Wood studs and blocking
Wood framing is common in residential closets. A safe mounted to studs can be secure when fasteners are correctly sized and placed. If the safe does not align with studs, add solid blocking between studs rather than relying on drywall anchors.Blocking is especially useful for a closet hidden safe because closet layouts rarely match safe bolt holes perfectly. A contractor can install horizontal blocking inside the wall cavity, then patch and finish the wall before mounting the safe. For heavier safes, confirm that the framing can carry the load without twisting, splitting, or pulling away.
Masonry and concrete
Concrete and masonry can provide excellent anchoring when the correct anchors and drilling methods are used. A basement closet, garage-adjacent closet, or closet with a slab floor may allow strong base anchoring. Use anchors appropriate to the substrate, such as concrete wedge anchors, sleeve anchors, or other manufacturer-approved options.Masonry walls vary in strength. Solid concrete is different from hollow block, brick veneer, or deteriorating mortar. When in doubt, use a professional installer who can evaluate the wall and choose the right anchor style.
Cabinetry and furniture panels
Cabinetry may look strong while hiding weak materials. Many cabinet boxes use thin backs, engineered panels, or lightweight shelves. A safe hidden in wardrobe cabinetry should be connected to reinforced panels, side walls, cleats, or framing, not only to decorative surfaces.A reliable cabinet installation often uses a combination of concealed reinforcement and through-bolting. For example, a safe can be attached to a reinforced cabinet base and then anchored through the cabinet into the wall behind it. This creates a more secure system than relying on the cabinet alone.
Anchoring and bolting essentials
Anchoring turns a hidden safe from a portable container into a fixed security feature. The exact fasteners should follow the safe manufacturer’s instructions, but the principles are consistent: use solid structure, correct hardware, proper hole depth, and firm contact between the safe and mounting surface.
A basic anchoring plan should cover:
- Safe weight and contents: Plan for the loaded weight, not just the empty safe.
- Bolt hole locations: Check whether the safe has rear, side, or floor mounting holes.
- Substrate type: Match anchors to wood, concrete, masonry, or reinforced cabinetry.
- Access for tools: Make sure there is room to drill, tighten, and inspect bolts.
- Door operation: Confirm the safe door opens fully after the safe is fastened.
- Concealment clearance: Leave space for panels, trim, clothing, or shelves.
For wood framing, lag screws or structural screws are commonly used when permitted by the safe manufacturer. For concrete, use anchors rated for the material and load. For cabinets, consider machine bolts with washers or backing plates when through-bolting is possible.Tight fastening matters, but overtightening can damage cabinet panels, deform a safe body, or strip holes in wood. The safe should sit flat against the mounting surface without rocking. If the surface is uneven, correct the surface rather than using loose shims that could shift later.
How do you hide a safe without making it hard to use?
You hide a safe well by making it blend into normal closet storage while keeping the access path simple, repeatable, and clear. A concealment method that requires moving ten boxes every time will eventually be abandoned, which defeats the purpose of secret safe installation.Good concealment looks ordinary. A panel should match nearby cabinet interiors. A shelf should appear functional. A hanging garment section should not look strangely empty or staged. The best secret storage solutions are the ones that do not call attention to themselves.
Practical concealment options include:
- Removable closet panels: A simple panel can cover a wall safe while matching the surrounding wall or cabinet finish.
- False cabinet backs: These work well for a hidden safe in cabinet or hidden safe in wardrobe installation when they are easy for the owner to remove.
- Swing-out organizers: Belt racks, tie racks, jewelry organizers, or shallow shelving can conceal a safe behind a normal closet accessory.
- Drawer-front disguises: A drawer face can conceal a fixed safe compartment, provided it does not make the safe look like a working drawer if it is not one.
- Clothing and garment cover: Hanging clothes can conceal a safe hidden in closet framing, though the safe should not be placed where hangers scrape the lock or keypad.
Concealment should not block ventilation if the safe requires it, interfere with electronics, or trap moisture. If the safe has a keypad, biometric reader, interior light, or battery compartment, the owner must still be able to maintain it.

Step-by-step planning process for a closet hidden safe
A successful installation is usually won or lost before drilling begins. Use the planning stage to prevent weak anchoring, awkward access, and visible patchwork.
1. Choose the purpose of the safe
Decide what the safe needs to hold. Documents, jewelry, passports, backup drives, small collectibles, and emergency cash all have different space requirements. If items are sensitive to moisture or heat, choose a safe and location that support those needs.Also consider how often the safe will be opened. A safe used weekly should be easier to reach than one used only for long-term storage. Convenience should not override security, but an inconvenient safe is less likely to be used consistently.
2. Measure the closet carefully
Measure width, height, depth, shelf spacing, rod clearance, and door swing. For a built in hidden safe, also measure the surrounding trim, baseboards, drawer fronts, and cabinet panels. Small conflicts can create large installation problems.For wall installations, locate studs and identify the wall cavity depth. Do not assume every wall is clear. Use appropriate detection tools and, where needed, have a professional check for electrical, plumbing, or mechanical components before cutting.
3. Confirm the mounting structure
Identify the real anchor point. If the safe will go in a wall, find studs or add blocking. If it will go in a cabinet, inspect the cabinet construction and plan reinforcement. If it will sit low, decide whether it can be bolted to the floor, wall, or both.This step is especially important for hidden safe lockers in wardrobe systems. Wardrobes may be modular, freestanding, or built-in. A freestanding wardrobe can sometimes be moved unless it is secured to building structure, so the safe should not depend on the wardrobe alone.
4. Plan concealment before installation
Choose the cover method before the safe is mounted. A safe installed first may later conflict with the panel, hinge, shelf, or organizer meant to hide it. Check the thickness of concealment materials and the reach needed to unlock and open the safe.The cover should be quiet, durable, and easy to put back in place. If it rattles, sticks, or looks out of alignment, it may attract attention. In a custom closet, matching the panel finish to surrounding cabinetry can make the storage look intentional.
5. Test the access path
Before final fastening, place the safe or a cardboard template in the intended position. Stand in the closet and simulate opening it. Check whether closet doors, lights, rods, drawers, shelves, and clothing interfere.This test is simple, but it prevents frustrating mistakes. A safe can fit dimensionally and still be unpleasant to use if the door hits a shelf or if the keypad is too close to the side wall.
Installation checklist
Use this checklist as a practical guide before and during installation:
- Verify that the selected safe fits the intended closet, cabinet, or wardrobe space.
- Check loaded weight and confirm the support structure can handle it.
- Locate studs, blocking, concrete, masonry, or reinforced cabinet components.
- Confirm there are no utilities in the drilling or cutting area.
- Follow the safe manufacturer’s mounting instructions and hardware requirements.
- Use anchors designed for the actual surface, not just what appears to be there.
- Keep the safe level, flush, and stable before tightening all fasteners.
- Test the lock, handle, hinges, and door swing after anchoring.
- Install concealment panels or closet accessories without restricting access.
- Store backup keys, override codes, or maintenance instructions securely outside the safe.
A checklist also helps if more than one person is involved, such as a homeowner, carpenter, locksmith, or closet installer. Everyone should understand whether the priority is wall concealment, cabinet integration, fire-resistant storage, theft resistance, or everyday convenience.
Common mistakes that weaken secret safe installation
Many closet safe problems come from treating concealment as more important than anchoring. A hidden safe that can be lifted out is not properly installed. A decorative cover may hide the safe from view, but it does not compensate for weak fasteners or poor structure.
Common mistakes include:
- Bolting only to drywall: Drywall cannot serve as the main support for a safe.
- Using a loose cabinet as the anchor: A safe hidden in cabinet furniture should be tied into stronger structure whenever possible.
- Ignoring door swing: If the safe door cannot open fully, access becomes awkward and may damage the closet interior.
- Choosing a location that is too obvious: A single blank panel in an otherwise busy closet may stand out.
- Blocking battery access: Electronic locks may need battery changes, so concealment should allow maintenance.
- Forgetting moisture control: Closets on exterior walls or near bathrooms may need extra attention to humidity.
- Overloading shelves: A heavy safe on a standard shelf can sag or fail if the shelf is not designed for the load.
Another mistake is making the hiding method too complicated. If the owner has to remember a sequence of removable parts, magnets, hooks, and stacked bins, access becomes inconvenient. Simple, sturdy concealment is usually better than theatrical concealment.
Safety, code, and professional help
Closet safe installation may involve cutting walls, drilling masonry, modifying cabinetry, or adding structural support. If any part of the installation affects framing, electrical wiring, plumbing, fire-rated assemblies, or building systems, use a qualified professional. This is especially important for hidden wall safe installation because wall cavities can contain more than empty space.
Renters should obtain permission before drilling, cutting, or anchoring into walls, floors, or built-ins. Homeowners in condos or townhomes may also need to consider shared walls, fire separations, and association rules. When the safe is unusually heavy, confirm that the floor or cabinet system can support the load.
A locksmith, security professional, carpenter, or closet contractor may each play a different role. The security professional can help select the safe and lock type. The carpenter or closet installer can create the built-in concealment and reinforcement. The best results often come when mounting and finish design are planned together.
Choosing between wall, cabinet, and wardrobe installations
The right choice depends on the closet layout, safe size, and how much construction you are willing to do. None is automatically best. A hidden safe in closet framing may be ideal in one home, while a safe hidden in wardrobe cabinetry may be more practical in another.
| Installation type | Best for | Main advantage | Main caution |
| Hidden wall safe | Shallow valuables, documents, small items | Clean concealment between or within framing | Requires careful utility checks and structural support |
| Safe hidden in cabinet | Custom closets, built-ins, cabinet bases | Blends with storage and can be convenient | Cabinet must be reinforced and anchored |
| Wardrobe hidden safe | Modular or built-in wardrobe systems | Works with vertical compartments and doors | Freestanding wardrobes may not be secure alone |
| Floor/base-mounted safe | Heavier safes or lower closet zones | Strong anchoring potential into floor or wall | May be less convenient to access |
If you want the most integrated look, a built in hidden safe is often worth planning during a closet remodel. If you want less construction, a reinforced cabinet or base-mounted option may be more realistic. If you want a discreet document safe, a hidden wall safe may be enough, provided the wall structure is suitable.
Practical design details that improve daily use
Small details make a closet safe easier to live with. Lighting, reach, clear floor space, and quiet access all affect whether the safe remains practical over time. A secure installation should not feel like a daily obstacle.Place the safe where you can stand comfortably while opening it. Avoid locations directly behind heavy sliding doors, deep piles of storage, or fragile items. If the closet is dark, add general closet lighting rather than a spotlight that points directly at the concealed area.
For electronic locks, think about battery replacement and keypad visibility. For key locks, plan where the key will be stored without making the hiding place obvious. For biometric locks, ensure the scanner can be reached naturally and kept clean.Concealment should also fit the style of the closet. In a simple reach-in closet, hanging clothes and a removable panel may look normal. In a high-end wardrobe, a matching cabinet insert or false drawer front may be more convincing. The best secret storage solutions look like they belong.
Maintenance after installation
A hidden safe should be checked periodically, especially if it is behind panels or inside cabinetry. Make sure fasteners remain tight, the door opens smoothly, and the concealment piece still fits properly. Wood movement, cabinet settling, and repeated access can change alignment over time.Keep the interior dry and organized. Use document sleeves, small trays, or pouches so items do not block the locking bolts from the inside. If the safe has electronics, replace batteries before they fail and keep override procedures in a secure separate location.If you change the closet layout later, revisit the safe installation. New shelving, rods, drawers, or storage bins can interfere with access. A safe hidden in closet storage should remain hidden, but it should never become buried or forgotten.
Key takeaways for a secure hidden safe in closet storage
A successful closet safe installation combines three things: strong anchoring, believable concealment, and practical access. If one of those is missing, the installation is weaker than it looks.
Remember these core principles:
- Mount the safe to real structure, such as studs, blocking, masonry, concrete, or reinforced cabinetry.
- Choose a safe style that matches the closet space and the items being stored.
- Plan concealment before drilling so the safe, cover, and access path work together.
- Avoid relying on drywall, thin cabinet backs, or unsupported shelves.
- Keep maintenance access available for keys, batteries, hinges, and locking mechanisms.
- Use professional help when cutting walls, modifying framing, drilling masonry, or working around utilities.
A closet can be an excellent place for secret safe installation when it is treated as a built system rather than a hiding spot. Whether you choose a hidden safe in cabinet millwork, a hidden safe in wardrobe storage, or a wall-mounted option behind closet finishes, the priority is the same: secure the safe first, conceal it second, and make sure you can use it confidently for years.