How to Install a Safe in a Wardrobe: A Practical Guide for Built-In and Hidden Safes
Installing a safe inside a wardrobe is not simply a matter of finding an empty cabinet compartment and sliding the safe into place. A good installation has to account for the usable internal dimensions of the wardrobe, the way the safe opens, the strength of the surrounding furniture, access to mounting points, and, in the case of a smart safe, access to charging ports, emergency keys and electronic controls.
For homeowners, interior designers, hotel contractors and custom furniture manufacturers, these details become especially important when the safe is intended to look like part of the wardrobe rather than a separate metal box added afterward. A well-planned hidden wardrobe safe can sit naturally within a walk-in closet, bedroom cabinet or custom dressing room while remaining convenient for everyday use.
This guide explains how to install a safe in a wardrobe, what measurements should be confirmed before installation, how different safe designs affect the cabinet layout, and which installation mistakes are worth avoiding before the furniture is completed.
Can You Install a Safe Inside a Wardrobe?
Yes. A safe can be installed inside a wardrobe provided that the furniture offers enough usable space, suitable structural support and sufficient clearance for the safe to open and operate correctly.The important point is that fitting a safe inside the cabinet is only one part of the job. A safe may physically fit between two wardrobe panels but still be difficult to use if its drawer cannot extend fully, its door hits a hinge, or its emergency access point becomes blocked by surrounding furniture.
Before choosing a safe for wardrobe installation, it is therefore useful to think about the safe and the wardrobe as one combined system. The safe dimensions, cabinet dimensions, mounting method and daily access requirements should all be considered together.This is especially relevant in custom wardrobes and walk-in closets, where a safe may be installed behind a cabinet door, beneath a jewelry drawer, inside a dressing island or within a dedicated storage compartment.
What Type of Safe Can Be Installed in a Wardrobe?
Several types of safes can work well inside wardrobes, but the best design depends on the furniture layout and the valuables being stored.
Built-In Wardrobe Safe
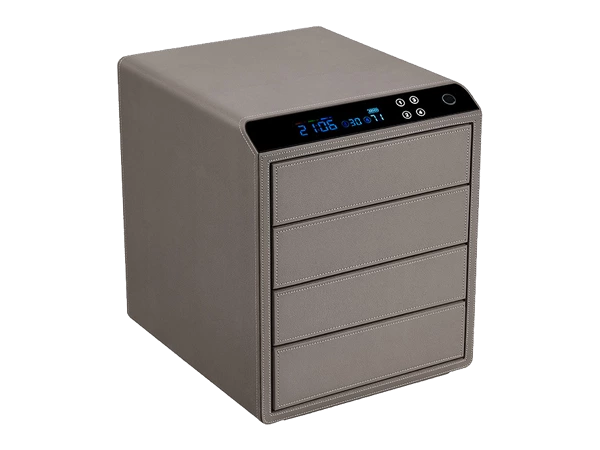
A built-in wardrobe safe is designed to integrate into a prepared cabinet opening or furniture compartment. This type of installation is often used in custom bedrooms, walk-in closets, hotel suites and luxury residential projects.The main advantage is flexibility. When the safe dimensions are confirmed during the furniture design stage, the surrounding cabinet can be planned around it. This allows the installer to consider mounting positions, opening clearance, electrical access and decorative panels before the wardrobe is manufactured.A built-in safe does not necessarily need to be completely concealed. In some projects, the front panel remains visible when the wardrobe is opened. In others, the safe may sit behind a cabinet door or within a specially designed compartment.
Drawer Safe
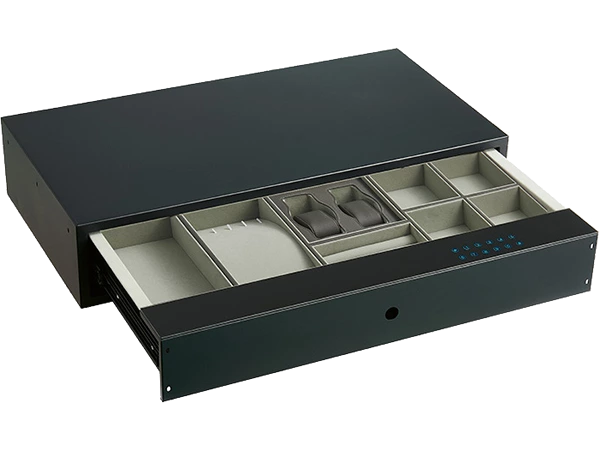
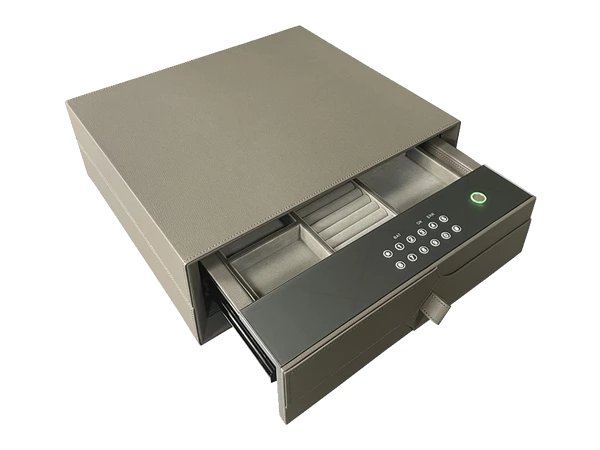
A safe drawer in wardrobe furniture is particularly convenient for jewelry, watches, documents, cash and personal valuables that need to be accessed regularly.Instead of opening like a traditional front-hinged safe, a drawer safe pulls outward horizontally. This makes it well suited to waist-height positions within wardrobes and dressing rooms.However, drawer safes have one installation requirement that is sometimes overlooked: the cabinet must provide enough space not only for the safe body but also for the drawer to extend.A 400 mm deep safe, for example, does not mean that only 400 mm of space needs to be considered. There must also be enough unobstructed room in front of the cabinet for the drawer to open fully.
Hidden Wardrobe Safe
A hidden safe in wardrobe furniture is installed so that it is less immediately visible within the room. Depending on the furniture design, the safe may sit behind wardrobe doors, decorative panels or other cabinetry.This type of installation is popular where interior appearance is important, particularly in high-end bedrooms and walk-in closets.Concealment should not, however, replace proper installation. A hidden safe still needs appropriate mounting, structural support and reliable access to its locking system.
Jewelry and Watch Storage Safe
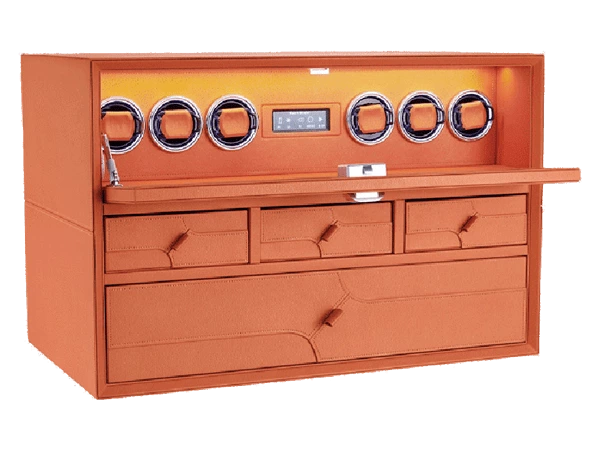
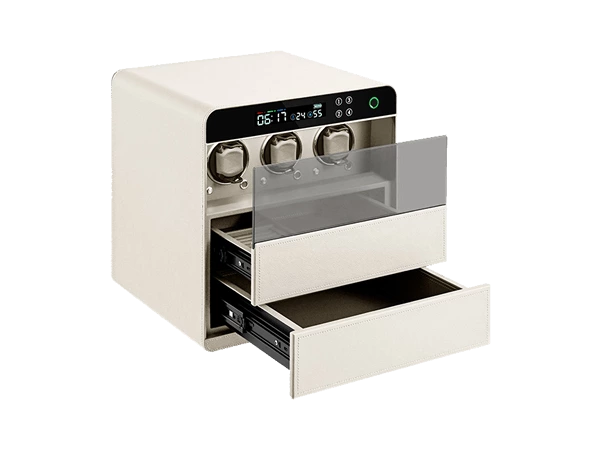
For buyers who mainly want to protect watches, jewelry and luxury accessories, the internal layout can be as important as the safe itself.Some wardrobe safes can be configured with leather-lined jewelry trays, ring sections, watch compartments, drawers or integrated watch winders. These interiors help organize smaller valuables and reduce the need to stack items inside a single open compartment.For luxury closet projects, this type of interior can make the safe feel more like part of the wardrobe system rather than a separate security product.
Measure Your Wardrobe Before Choosing the Safe
Accurate measurement is one of the most important steps before installation. Choosing a safe based only on a catalogue size can cause problems later, particularly when the wardrobe has hinges, internal dividers, decorative panels or drawer runners that reduce the usable space.When checking the safe size for wardrobe installation, measure the actual usable interior rather than the outside dimensions of the furniture.
Measure the Internal Width
Measure the clear distance between the internal side panels where the safe will sit.Pay attention to anything that enters this space, including concealed hinges, drawer slides, trim pieces or support brackets. A compartment that appears to be 700 mm wide from the outside may provide noticeably less usable width internally.A small amount of installation tolerance is also useful. Designing the cabinet opening to exactly match the nominal width of the safe can make installation unnecessarily difficult.
Measure the Internal Depth
Depth often creates more problems than width.Measure from the usable front edge of the cabinet to the rear surface where the safe will actually sit. If the wardrobe has a thin decorative back panel with a gap behind it, the visible cabinet depth may not represent the real mounting depth.You should also consider anything located behind the safe, including cables, mounting hardware and charging connections.For drawer models, make sure the front of the safe aligns correctly with the cabinet opening without interfering with wardrobe doors.
Measure the Available Height
Measure the clear vertical space between the supporting shelf and the panel above it.This is particularly important when the safe is being installed below a jewelry drawer, hanging rail or wardrobe shelf. Even a small difference in height can affect whether the safe can be positioned correctly.
Allow Space for the Door or Drawer to Open
The dimensions printed on a safe specification sheet normally describe the product itself. They do not always represent the total space required when the product is being used.A front-opening safe needs enough room for the door to swing without hitting surrounding furniture. A drawer safe needs enough front clearance to extend fully.
A useful way to plan the space is to separate the measurements as follows:
| Measurement | Why It Matters |
| Safe width | Determines the minimum cabinet opening |
| Safe depth | Determines whether the safe fits completely inside |
| Safe height | Determines required vertical space |
| Door clearance | Allows a hinged safe door to open fully |
| Drawer extension | Allows a pull-out safe to operate normally |
| Rear clearance | Provides space for mounting or cables |
| Charging access | Keeps smart safe charging points reachable |
One of the simplest rules is also one of the most important: safe dimensions and installation dimensions are not always the same thing.
Check the Wardrobe Structure Before Installation
After confirming the dimensions, the next question is whether the surrounding furniture provides an appropriate installation structure.Wardrobes are manufactured from many different materials, including plywood, solid wood, MDF, particleboard and metal. These materials do not all behave the same way when used as part of a safe installation.
Solid Wood and Plywood Cabinetry
Solid timber and good-quality plywood are commonly used in custom furniture and can provide a relatively stable cabinet structure.Even so, the thickness of a panel alone does not determine whether it is an appropriate fixing point. The overall cabinet construction, safe weight and location of the structural frame should also be considered.For larger or heavier safes, installers may need to identify the stronger supporting sections of the furniture rather than simply fastening into the nearest panel.
MDF and Particleboard Wardrobes
MDF and particleboard are widely used in modern wardrobes, but thin decorative panels should not automatically be treated as structural mounting surfaces.This is especially important at the rear of a wardrobe. Many cabinets use a relatively thin back panel that is intended to close the furniture visually rather than carry structural loads.Where stronger mounting is required, the cabinet may need additional reinforcement or a connection to a more substantial supporting structure.
Metal Wardrobes and Frames
Commercial furniture and some modern wardrobe systems use metal frames or metal cabinet bodies.In these cases, installers should confirm the frame thickness, existing mounting positions and the safe manufacturer's recommended installation method before drilling or modifying the furniture.The safest approach is usually to plan around the factory-designed mounting points of the safe rather than creating new holes in the safe body without technical confirmation.
Choose the Best Position for the Safe
A safe can be installed in several areas of a wardrobe, but daily convenience should be considered together with concealment and structural support.
Lower Wardrobe Compartments
Lower compartments often provide good support because the safe can sit closer to the base of the furniture.They can also make the safe less immediately visible when the wardrobe is opened.The trade-off is convenience. If the safe contains jewelry or watches that are accessed every day, a very low installation position may require repeated bending.
Waist-Height Drawer Position
For a pull-out wardrobe safe, waist height is often one of the most practical positions.The fingerprint sensor or password panel remains easy to reach, and jewelry trays can be viewed without crouching. This arrangement is particularly suitable for dressing rooms, walk-in closets and wardrobe islands.
Behind Wardrobe Doors
Installing the safe behind normal wardrobe doors provides visual concealment while keeping the safe relatively easy to access.Before finalizing this layout, check the opening sequence carefully. The wardrobe door must open far enough that it does not interfere with the safe drawer or safe door.This detail is easy to miss on a furniture drawing but immediately obvious after installation if it has not been planned correctly.
Inside a Walk-In Closet
A walk-in closet offers more flexibility because the safe can be considered as part of the overall storage layout from the beginning.Interior designers can coordinate the safe with jewelry drawers, watch storage, shelving, lighting and dressing areas. When this planning happens before furniture production, it is usually much easier to achieve a clean integrated result.
How to Install a Safe in a Wardrobe Step by Step
The exact procedure varies by safe model and cabinet structure, but most wardrobe installations follow the same general sequence.
Step 1: Confirm the Safe Dimensions
Before cutting, drilling or modifying the wardrobe, verify the actual dimensions of the safe.Check the width, depth and height as well as the dimensions required when the door or drawer is fully open.If the safe has handles, a projecting lock panel or other front components, these should also be included in the planning.
Step 2: Mark the Installation Position
Place or mark the safe position inside the wardrobe and confirm its alignment with the surrounding furniture.At this stage, check that the front panel is positioned correctly and that there is enough clearance around the safe.For custom cabinetry, it is useful to mark the exact safe outline and planned fixing points before the final decorative panels are installed.
Step 3: Check the Factory Mounting Points
Most safes intended for installation have designated mounting locations, which may be positioned on the base, rear panel or both depending on the design.Identify these points before modifying the cabinet.Whenever possible, use the mounting positions specified by the safe manufacturer. Drilling additional holes into the safe body without confirming the structure may damage internal components or affect the safe construction.
Step 4: Prepare the Furniture Opening
If the safe is going into a newly manufactured wardrobe, the cabinet opening should already correspond with the agreed installation dimensions.For an existing wardrobe, this stage may require removing a shelf, strengthening a support panel or adjusting surrounding furniture.Check the cabinet again after any modification. A few millimeters lost through added trim or reinforcement can affect the final fit.
Step 5: Position and Align the Safe
Place the safe into the prepared opening but do not complete the final fixing immediately.First check that it sits level and square within the furniture. Open the door or extend the drawer several times.This is also the right moment to check whether the fingerprint reader, keypad, charging interface and emergency key position can be reached comfortably.
Step 6: Secure the Safe
The appropriate fixing method depends on the safe design and the structure behind or below the wardrobe.In some projects, the safe may be fixed to a structural furniture frame. In others, installation may involve a wall, floor or reinforced panel behind the cabinet.The important point is to distinguish between structural material and decorative furniture panels. A thin wardrobe back should not automatically be treated as an equivalent substitute for a suitable structural mounting surface.Follow the mounting recommendations for the safe model and use an installer experienced with the surrounding furniture or building structure where necessary.
Step 7: Test the Safe After Installation
Once the safe is secured, test every operating function again.The door or drawer should move freely without rubbing against the cabinet. Fingerprint and password access should work normally, and any app or Bluetooth function should be tested if included with the model.The emergency key and charging connection should also remain accessible.It is much easier to correct a small alignment issue at this stage than after the entire wardrobe has been completed.
How to Build a Safe Into Your Wardrobe
If you are designing a new wardrobe rather than modifying an existing one, the best approach is to consider the safe during the furniture design stage.This gives both the furniture manufacturer and safe manufacturer an opportunity to work from the same dimensions.
Plan the Safe Before the Wardrobe Is Manufactured
A common mistake in custom projects is completing the wardrobe first and choosing the safe afterward.This limits the available dimensions and may force the furniture maker to redesign shelves or drawers.When the safe is selected first, the cabinet can be planned around its width, depth, opening direction and mounting points.For a wardrobe with hidden safe installation, early planning also gives the designer more control over how much of the safe is visible.
Coordinate the Safe Front With the Furniture
In high-end interiors, the safe does not necessarily have to look industrial.Depending on the product design, the exterior may use leather, microfiber, metal finishes or colors coordinated with the surrounding furniture.The internal layout can also be customized to match the project. Jewelry trays, watch sections, document storage and watch winders can be arranged according to the customer's intended use.This is particularly useful for luxury villas, apartments, hotels and custom furniture brands that want the security product to fit naturally into the room design.
Send Cabinet Dimensions to the Safe Manufacturer
If you are working with a manufacturer on a custom safe, provide the usable furniture dimensions rather than only the overall wardrobe size.
A useful project brief includes:
- Internal cabinet width
- Internal cabinet depth
- Available height
- Front opening width
- Preferred installation height
- Available front clearance
- Cabinet material
- Intended mounting position
For larger projects, a CAD drawing, shop drawing or cabinet layout is even more useful. It allows potential conflicts to be identified before either the furniture or the safe goes into production.
Installing a Smart Wardrobe Safe: What Else Should You Consider?
Smart wardrobe safes introduce a few additional installation considerations that do not apply to every traditional mechanical safe.The exact functions depend on the safe model, so always confirm the actual specification before designing the furniture.
Fingerprint Access
The fingerprint reader should remain easy to reach after installation.A decorative drawer front, cabinet frame or neighboring shelf should not block the user's hand from reaching the sensor naturally.For daily-use jewelry safes, this small ergonomic detail makes a noticeable difference.
Password Access
If the safe uses a keypad or touch panel, check its viewing angle and position.The panel should not be hidden beneath a shelf or placed so low that entering a password becomes inconvenient.
Bluetooth or App Access
Some smart wardrobe safes may support Bluetooth or app-based functions such as Tuya integration, depending on the model configuration.These systems should be tested after installation, particularly where thick cabinet panels or other surrounding structures may affect normal operation.
Charging and Power Access
Some electronic safes use rechargeable batteries and may include Type-C charging or another emergency power connection.Do not design the wardrobe so tightly that the charging interface becomes inaccessible.A safe that looks perfectly integrated but requires furniture removal every time it needs charging has not been planned well.
Emergency Key Access
Electronic convenience should never cause the mechanical backup access to be forgotten.
If the model has an emergency key, the keyhole must remain reachable after installation.
The emergency key itself should also be stored somewhere secure and separate from the safe rather than inside the safe it is intended to open.
Common Wardrobe Safe Installation Mistakes
Most installation problems are not caused by complex technical issues. They usually come from measurements or practical details that were overlooked early in the project.
Choosing a Safe Based Only on Its External Dimensions
A safe may appear to fit according to the specification sheet but still require additional clearance for the drawer, door, cables or mounting hardware.This is why the installation space should be checked separately from the product dimensions.
Ignoring Door or Drawer Clearance
One of the most frustrating installation outcomes is a safe that fits neatly into the cabinet but cannot open fully.Check the entire movement of the door or drawer before the fixing points are finalized.Wardrobe hinges, neighboring drawers and cabinet doors can all reduce the usable opening angle.
Mounting Only to a Thin Decorative Panel
The visible back panel of a wardrobe may not be the strongest part of the furniture.Before fixing the safe, determine where the actual supporting structure is located and whether reinforcement is required.
Blocking Charging or Emergency Access
Smart safes need practical service access.Avoid placing permanent trim, dividers or decorative panels over battery compartments, charging ports or emergency key positions.
Installing Before Testing the Safe
The safe should be tested before final installation.Check the lock, fingerprint recognition, password function, drawer movement and any supplied smart functions first. This helps separate product issues from installation-related problems.
Failing to Coordinate With the Furniture Manufacturer
In B2B projects, the safe supplier and cabinet manufacturer are often working on different parts of the same installation.If their drawings are not coordinated, small differences in dimensions or opening directions can lead to costly rework.For custom installations, confirming the safe drawing and wardrobe drawing together is one of the simplest ways to avoid this problem.
Should You Install the Safe Yourself or Use a Professional?
Some small wardrobe safes may be straightforward to position and install, particularly when they are being fitted into purpose-built furniture.More complicated projects deserve professional installation.This is particularly true for heavy safes, installations involving structural anchoring, expensive custom cabinetry or situations where walls and floors may contain electrical wiring, plumbing or other hidden services.A cabinet maker may understand the furniture well but not the safe. A safe installer may understand the security product but not the custom wardrobe. For high-end projects, coordination between both sides usually produces the best result.
What Information Should You Give a Wardrobe Safe Manufacturer?
If you need a custom safe in wardrobe furniture, providing accurate project information can shorten the design process considerably.Instead of sending only a photograph and asking what size safe will fit, provide the measurements and intended use.
| Information | Example |
| Wardrobe internal width | 700 mm |
| Internal depth | 450 mm |
| Available height | 180 mm |
| Safe type | Pull-out drawer safe |
| Storage purpose | Jewelry and watches |
| Preferred unlocking | Fingerprint + password |
| Interior | Leather jewelry organizer |
| Exterior finish | Black / leather wrapped |
| Quantity | Project requirement |
| Drawing | CAD or cabinet drawing |
For distributors, furniture manufacturers, interior design firms and hotel projects, this information also makes it easier to discuss OEM or customized production.
Final Wardrobe Safe Installation Checklist
Before installation, confirm the safe dimensions, usable wardrobe space, opening clearance, mounting points and cabinet structure. Make sure charging interfaces and emergency access points will remain available after the furniture is completed.After installation, check that the safe is level, secure and unobstructed. Open the door or drawer fully several times and test every unlocking method supplied with the model.
A simple checklist can prevent many common problems:
Before installation:
- Confirm the safe width, depth and height.
- Measure the usable wardrobe opening.
- Check door or drawer clearance.
- Identify the factory mounting points.
- Confirm the cabinet supporting structure.
- Keep charging and emergency access available.
- Test the locking system.
After installation:
- Check alignment.
- Fully open the door or drawer.
- Test fingerprint access.
- Test password access.
- Test the emergency key.
- Check charging access.
- Confirm that the safe remains stable during normal operation.
Frequently Asked Questions
Can you install a safe inside a wardrobe?
Yes. A safe can be installed inside a wardrobe if the cabinet provides sufficient usable space, suitable support and enough clearance for the safe to open properly. The installation method should match both the safe design and the wardrobe structure.
What size safe should I choose for a wardrobe?
Choose a safe that fits within the usable internal width, depth and height of the wardrobe while still leaving enough space for opening, mounting and service access. For drawer safes, remember to consider the full drawer extension as well as the safe body size.
Can a safe be installed in an existing wardrobe?
Yes. Many safes can be fitted into existing wardrobes, but the cabinet dimensions and supporting structure should be checked before installation. Some furniture may need modification or reinforcement.
Can a drawer safe be built into a wardrobe?
Yes. Drawer safes are particularly suitable for wardrobes, dressing rooms and walk-in closets. They can be integrated into dedicated cabinet compartments, provided that enough front space is available for the drawer to extend fully.
Does a wardrobe safe need to be bolted down?
The safe should be secured using a fixing method suitable for its design and the surrounding structure. Thin decorative furniture panels should not automatically be treated as structural mounting surfaces. Follow the safe manufacturer's installation recommendations and use appropriate professional installation where required.
Can a fingerprint safe be installed inside a wardrobe?
Yes. Fingerprint safes can be integrated into wardrobes as long as the fingerprint reader remains easy to access and the surrounding cabinet does not block charging ports, emergency key access or door and drawer movement.
Manufacturer's Note
For custom wardrobe projects, we recommend confirming the cabinet's usable internal width, depth and height before the safe dimensions are finalized. Drawer travel, door clearance, mounting positions and access to charging or emergency interfaces should also be reviewed before production.For projects involving custom cabinetry, a wardrobe drawing or CAD file is often more useful than a single overall measurement. It allows the safe dimensions, opening direction, installation position and interior layout to be considered together before manufacturing begins.