How to Install a Safe in a Closet: Placement, Anchoring and Built-In Tips
Installing a safe inside a bedroom closet or walk-in wardrobe can be a practical way to keep jewelry, watches, documents and other personal valuables close to where they are used. However, a successful installation involves much more than placing a metal box inside a cabinet and closing the door.Before installing a safe in a closet, you need to consider the actual cabinet dimensions, safe weight, furniture construction, mounting points, opening direction and access requirements. Electronic or smart safes may also need power planning, emergency access and enough service space for future maintenance.A safe that physically fits inside a closet is not necessarily correctly installed. The best results usually come from planning the safe and the surrounding furniture together, particularly when the product is built into a custom wardrobe or used as a jewelry drawer safe.
Can You Install a Safe Inside a Closet?
Yes. A safe can be installed inside a bedroom closet, wardrobe, dressing room or walk-in closet when the surrounding structure is suitable for the safe and its intended mounting method.Closets can be convenient locations because jewelry, watches and personal accessories are often already stored there. A properly positioned safe can become part of the daily dressing area instead of being placed in a separate room or inconvenient corner of the home.
That said, not every cabinet is automatically suitable. A lightweight shelf designed for clothing, for example, should not be treated as a structural support without checking how it is built. The correct installation should take into account both the safe manufacturer's mounting design and the construction of the furniture around it.For a custom built-in closet safe, these details are best confirmed before the wardrobe enters final production.
Decide What Type of Closet Safe You Are Installing
The installation process depends heavily on the type of safe.A small freestanding safe placed on the bottom of a closet requires a different approach from a fingerprint drawer safe integrated into custom cabinetry. Understanding the product type first makes it easier to plan the correct position and mounting method.
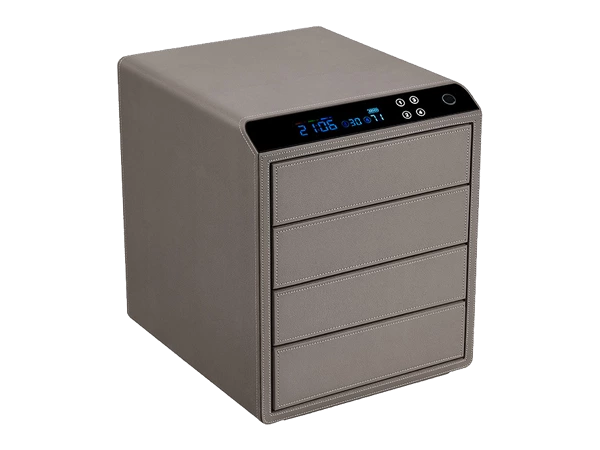
Built-In Closet Safe
A built-in closet safe is designed to become part of the wardrobe or cabinet structure.This type of installation is often used in luxury bedrooms, dressing rooms and walk-in closets where the safe should fit neatly into the furniture rather than sit separately on the floor. The cabinet opening, safe depth, door clearance and mounting position all need to be coordinated carefully.Built-in safes can also be positioned at a more comfortable height. For jewelry and watches that are used frequently, this may be more convenient than placing the safe close to floor level.
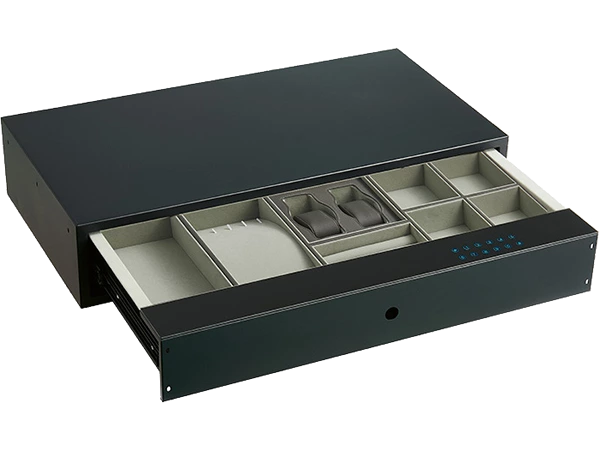
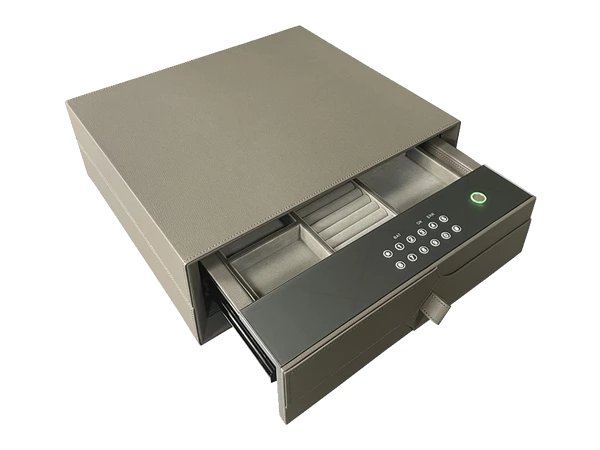
Closet Drawer Safe
A closet drawer safe is particularly useful for jewelry, watches, passports and other valuables accessed regularly.Instead of opening a traditional front-facing safe door, the user unlocks and pulls out a secure drawer. The horizontal layout makes it easier to see several jewelry compartments at the same time.
For installation, the cabinet width, depth, drawer travel and surrounding furniture need to be checked carefully. If the drawer cannot extend fully because of a nearby wardrobe door or handle, the safe may be difficult to use even if it technically fits the cabinet.Fingerprint drawer safes and other smart drawer models may also require power or emergency access planning.
Shelf Safe
A compact safe can sometimes be installed on a closet shelf, but the shelf must be appropriate for the weight and mounting arrangement.An ordinary wardrobe shelf may have been designed only for clothing, bags or lightweight storage. Before placing a safe there, consider the shelf material, support structure, fixing points and safe weight.The available depth is equally important. A safe that projects beyond the front of the shelf may interfere with cabinet doors or surrounding panels.
Freestanding Safe Inside a Closet
A freestanding safe is usually the simplest option.It can be placed on the floor or within a suitably prepared cabinet section without becoming fully integrated into the furniture. This provides more flexibility and may reduce the amount of cabinet modification required.Even so, anchoring, opening clearance and access should still be considered. A freestanding safe should not simply be placed wherever there happens to be space.
Step 1: Measure the Closet Before Installation
Accurate measurements are the foundation of a successful closet safe installation.Do not rely only on the nominal size of the wardrobe. Measure the actual finished opening where the safe will be positioned.
Measure Width, Depth and Height
Record the available:
- Width
- Depth
- Height
Depth is especially easy to overlook.
Many wardrobes look spacious from the front but provide limited usable depth because of back panels, drawer systems or decorative fronts. A safe may fit comfortably in width and height while still being too deep for the cabinet.
Compare the Safe's External Dimensions
Once the closet opening has been measured, compare it with the external dimensions of the safe.Do not make the fit unnecessarily tight. Depending on the product and installation method, some space may be required for positioning, cabling, mounting hardware or surrounding panels.If the safe is being customized for a specific cabinet, the finished furniture dimensions should be confirmed before the product goes into production.
Check Opening Clearance
A safe needs enough space not only to fit but also to open properly.For a front-opening safe, check how far the door needs to swing. For a drawer safe, measure the full drawer travel.Nearby wardrobe doors, drawer handles, decorative panels and shelves can all cause interference.One of the most common installation problems is a safe that fits perfectly inside the cabinet but cannot open fully once the surrounding furniture is installed.
Step 2: Choose the Right Position Inside the Closet
Position affects convenience, privacy and installation quality.There is no single best location for every closet safe, so the decision should reflect both the product structure and how frequently the valuables are used.
Consider Access Height
A safe used for jewelry and watches every day should generally be positioned where the user can access it comfortably.Installing it close to floor level may save cabinet space, but it can become inconvenient if the owner needs to bend down every morning to select jewelry.Drawer safes are especially suitable for comfortable mid-level installation because the contents can be viewed from above when the drawer is open.
Keep the Opening Area Clear
Make sure the safe will not conflict with:
- wardrobe doors
- adjacent drawers
- hanging clothing
- cabinet handles
- decorative panels
- shelves
The surrounding area should remain clear enough for full operation.
Consider Privacy Without Relying Only on Concealment
A safe can be integrated discreetly into a wardrobe, but concealment alone should not be treated as the main security measure.A hidden closet safe still needs appropriate physical construction, mounting and access control.
Keep Future Maintenance in Mind
Electronic safes may require future access to batteries, cables, power connections or emergency systems.Avoid building cabinetry in a way that permanently blocks components that may need to be serviced later.
Step 3: Check the Supporting Structure
A wardrobe is furniture, not automatically a structural mounting surface.Before installing a safe, evaluate what will actually support its weight.
Cabinet Base
A lower cabinet section may provide a stronger support position than a lightweight shelf, but the construction should still be checked.The safe weight plus the contents should be considered as part of the finished installation.
Shelf Installation
For a closet shelf safe, the shelf may need additional reinforcement or support.Do not assume that a shelf designed for folded clothing can safely carry a metal safe.If structural strength is uncertain, the furniture designer or installer should review the cabinet before the safe is installed.
Wall and Rear Structure
Some safes include rear mounting points.If these are going to be used, it is important to understand what material is actually behind the wardrobe panel. A thin decorative back panel is very different from a structural wall.The correct fixing method depends on both the safe design and the material behind the mounting surface.
Step 4: Identify the Safe's Mounting Points
Before drilling or modifying anything, inspect the safe itself.Many safes are manufactured with designated mounting holes or brackets in the base or rear panel. These positions are designed specifically for installation and should normally be used according to the manufacturer's instructions.Do not assume that arbitrary holes can be drilled into another part of the safe without affecting the product.For a custom built-in safe, mounting points should ideally be discussed during the product specification stage. This allows the safe manufacturer and furniture supplier to coordinate the installation more effectively.
Step 5: How Should a Safe Be Anchored in a Closet?
Anchoring helps limit movement or unauthorized removal, but there is no single mounting method that works for every safe and every closet.The correct solution depends on the product, the location and the material beneath or behind the furniture.
Floor Anchoring
Some safes are designed to be fixed through mounting holes in the base.This may be suitable when the safe is positioned on an appropriate structural floor and the installation conditions allow drilling.The correct fixing system depends on the underlying floor material, so a universal anchor type should not be assumed.
Rear Anchoring
Rear mounting can be useful when suitable structural support is available behind the safe.The wardrobe back panel itself may not provide enough support, so the installer needs to understand what lies behind the cabinet.
Furniture Integration
A built-in safe may also be incorporated into reinforced cabinetry.However, fixing the safe to furniture is not automatically the same as structural anchoring. The furniture needs to be designed with the safe weight and installation requirements in mind.
When Professional Installation Is Recommended
Professional installation is worth considering when:
- the safe is heavy
- structural drilling is required
- wall or floor material is uncertain
- expensive cabinetry requires modification
- electrical work is involved
- the safe has specialized anchoring requirements
For high-end wardrobe projects, professional coordination can also help prevent damage to the finished furniture.
Step 6: Plan Power for an Electronic or Smart Closet Safe
Smart closet safes require another layer of planning: power.Depending on the product, an electronic safe may use batteries, external power or a combination of systems. Some models may also provide emergency power access.Before the cabinetry is completed, confirm exactly how the selected safe is powered.
Keep Connections Accessible
Power connections should not be permanently buried behind furniture.If the safe needs servicing in the future, the power system should remain reasonably accessible.
Plan Emergency Power Access
If the product includes an emergency power connection, make sure it can still be reached after installation.This is an easy detail to overlook when decorative panels are being added around the safe.
Keep Cables Away From Moving Parts
Cables should not interfere with:
- safe drawers
- wardrobe drawers
- hinges
- sliding panels
- safe doors
The cable route should be planned before the furniture is finalized rather than added as an afterthought.
Step 7: Keep Emergency Access Available
Buyers often think carefully about how they will open the safe during normal use but spend less time considering what happens if the normal method is unavailable.
Before completing the installation, check the location of any:
- emergency key access
- emergency power port
- battery compartment
- removable service panel
These components should not be covered permanently by decorative cabinetry.For a biometric or digital closet safe, backup access is especially important because the product depends on an electronic authentication system during normal operation.
Step 8: Test the Safe Before the Cabinet Is Finished
This is one of the most useful steps in a built-in installation.Before surrounding panels, trim or decorative fronts are permanently completed, test every major function of the safe.
Check:
- fingerprint unlocking
- password unlocking
- mechanical backup access
- automatic opening if available
- safe door movement
- drawer travel
- locking mechanism
- power supply
- emergency power
- alignment with furniture
It is much easier to make a small adjustment at this stage than after the entire wardrobe has been completed.
How to Install a Drawer Safe in a Closet
Drawer safes deserve special consideration because their movement depends heavily on the furniture around them.Start by confirming the cabinet opening dimensions. Width and depth must allow the safe body to fit correctly, while the front area must provide enough space for the drawer to extend completely.The height should also be chosen according to how the safe will be used.A jewelry drawer positioned around comfortable hand level allows the owner to view rings, bracelets and watches much more easily than a drawer installed near the floor.For smart drawer safes, fingerprint access and automatic opening can make the daily experience more convenient, but the electrical and emergency systems should still remain accessible.In luxury wardrobes, the external appearance may also need to coordinate with surrounding panels. This is where early cooperation between the safe manufacturer and furniture designer becomes particularly valuable.
How to Install a Built-In Safe in a Walk-In Closet
A built-in walk-in closet safe is easiest to manage when the product is specified during the furniture design stage.
A practical project sequence is:
- Confirm the wardrobe concept.
- Select the intended safe type.
- Confirm safe dimensions.
- Verify structural support.
- Plan opening clearance.
- Plan power and emergency access.
- Confirm the fixing method.
- Install and test the safe.
- Complete surrounding cabinetry.
This sequence reduces the risk of discovering too late that the safe is too deep, the door opens in the wrong direction or the power connection has been covered.For custom projects, it is usually more efficient to make the furniture and safe dimensions work together from the beginning.
Where Is the Best Place to Install a Safe in a Closet?
The best position depends on the safe and the user's habits.
Dedicated Cabinet Section
A dedicated cabinet module provides a clean installation and can be planned specifically around the safe dimensions.This is a strong option for custom walk-in closets.
Drawer-Level Position
For jewelry and watches, a drawer-level safe can offer excellent daily accessibility.The user can open the secure drawer and view the collection without bending down.
Lower Cabinet
Lower cabinets may provide more structural support for heavier products, although convenience should still be considered.This position can work well for larger safes that are not opened frequently.
Reinforced Shelf
A reinforced shelf may be suitable for a compact safe when the structure has been specifically designed to support the load.
Walk-In Closet Cabinet
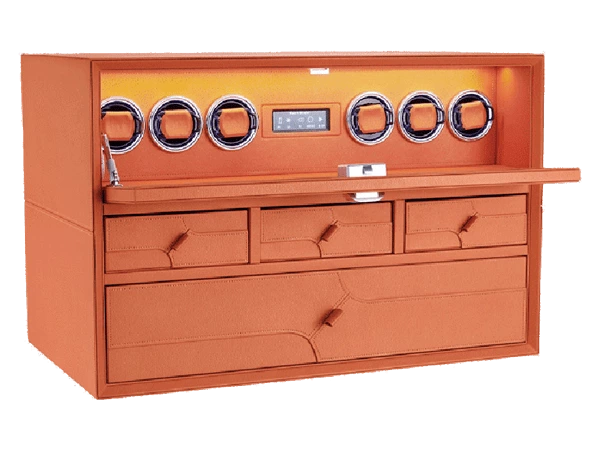
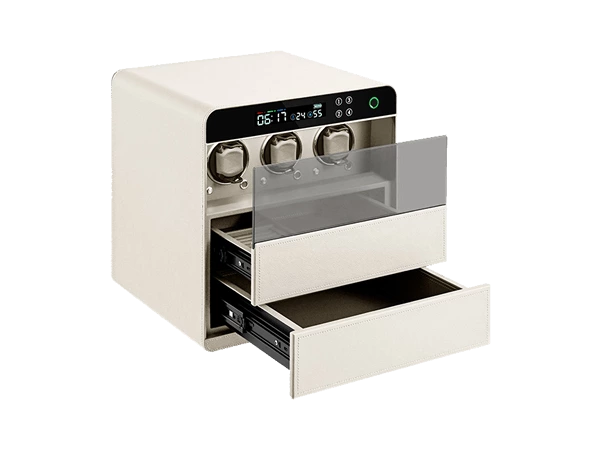
Larger multi-layer jewelry safes or watch winder safes can occupy a dedicated vertical cabinet section.There is no universal best position. The right location balances structural support, access convenience, opening clearance, privacy and maintenance.
Common Closet Safe Installation Mistakes
Many closet safe problems can be avoided during the planning stage.
Measuring Width but Forgetting Depth
This is one of the most common mistakes.Wardrobe depth is often more restrictive than width, especially when the safe includes a deep door structure or drawer system.
Ignoring Door Clearance
A safe may fit inside the cabinet but conflict with the wardrobe door when opened.Always test the complete opening movement.
Installing on an Unsupported Shelf
A shelf that looks strong may not be designed for a heavy safe.Confirm the structure rather than judging by appearance.
Blocking Emergency Access
Decorative panels should not permanently cover emergency keys, power ports or service areas.
Forgetting Power Before Furniture Completion
Electronic safes need power planning early.Adding power after a finished wardrobe has been installed can create unnecessary modification.
Installing the Safe Too Low
For daily jewelry and watch use, a very low installation can become inconvenient.Think about the owner’s actual routine rather than simply using the first available cabinet space.
Finishing the Furniture Before Testing
Test the safe before decorative trim and panels are permanently completed.This makes adjustment much easier.
Choosing the Safe After the Wardrobe Is Finished
This is possible, but it greatly restricts the available safe dimensions and installation options.For built-in projects, early coordination is usually more efficient.
Should the Safe Be Installed Before or After the Closet Is Built?
For a custom built-in safe, the most important point is not necessarily that the safe must be physically installed first.What matters is that the safe specification is confirmed before the furniture reaches final production.
A better planning sequence is: Safe specification → Furniture coordination → Safe installation → Final cabinet finishing
rather than: Finished wardrobe → Search for any safe that happens to fit
Confirming the product early allows the furniture company to design around the safe's real dimensions, opening direction, power system and fixing points.
Built-In Closet Safe vs Freestanding Safe Installation
Both types can work well, but the installation requirements are different.
| Installation Factor | Built-In Closet Safe | Freestanding Safe |
| Furniture planning | Important | Less critical |
| Custom dimensions | Often useful | Usually standard |
| Structural coordination | Usually required | Depends on position |
| Power planning | Important for electronic models | Usually simpler |
| Visual integration | High | Lower |
| Opening clearance | Must be planned carefully | Often easier |
| Installation complexity | Higher | Generally lower |
| Best suited for | Custom wardrobes and luxury interiors | General home storage |
A built-in safe makes sense when furniture integration and space efficiency are important. A freestanding model may be preferable when flexibility and simpler installation are the priority.Neither type is universally better.
Closet Safe Installation Checklist
Before installation, review the following points.
Before Installation
- Measure the finished wardrobe opening
- Confirm safe width, depth and height
- Check cabinet support
- Identify mounting points
- Confirm opening direction
- Check door or drawer clearance
- Plan electrical power if required
- Identify emergency access locations
During Installation
- Position the safe correctly
- Follow the manufacturer's mounting locations
- Keep electrical connections accessible
- Confirm safe alignment
- Protect surrounding furniture
- Check that no cables interfere with moving parts
Before Final Cabinet Finishing
- Test fingerprint access
- Test password access
- Test backup access
- Test the locking system
- Open the door or drawer completely
- Confirm power operation
- Confirm emergency access
- Check final alignment with surrounding cabinetry
What Information Should You Send a Safe Manufacturer?
If the safe needs to be customized for a wardrobe, providing complete project information early can help avoid installation problems.
Start with the available cabinet opening: Width × Depth × Height
A furniture drawing is even more useful because it can show nearby panels, shelves, doors and drawers.You should also provide the intended installation position and explain what will be stored inside the safe. Jewelry, watches, documents and mixed valuables may require different internal layouts.For electronic models, indicate the preferred unlocking methods, such as fingerprint, password, key backup, Bluetooth or mobile control where available.If external power is available inside the cabinet, include that information as well.For B2B projects, furniture companies, designers and distributors should also provide expected quantity, customization requirements and any relevant branding or packaging needs.
Manufacturer Insight: Plan the Safe Before the Furniture Is Finished
For custom wardrobe projects, one of the most useful decisions is to confirm the safe early.The external dimensions, cabinet opening, door or drawer clearance, mounting location and power system should ideally be reviewed before furniture production reaches its final stage.This is particularly important for smart drawer safes and jewelry safes because they interact directly with the surrounding cabinetry.It is also worth testing the complete product before decorative panels are permanently installed. Unlock the safe, extend the drawer, test the backup access and check the power connection while adjustments are still easy to make.A well-planned installation should make the safe feel like part of the wardrobe while still allowing the product to operate, open and be serviced correctly.
FAQ
How do you install a safe in a closet?
Start by measuring the available width, depth and height and checking the closet's supporting structure. Confirm the safe's mounting points, opening clearance, power requirements and emergency access before installation. The safe should then be secured using the mounting method designed for the product and suitable for the surrounding structure.
Should a safe be anchored inside a closet?
Anchoring is commonly used to reduce movement or unauthorized removal, but the appropriate method depends on the safe design and the wall, floor or furniture structure around it. Follow the manufacturer's mounting requirements rather than assuming one anchor type is suitable for every installation.
Can you bolt a small safe inside a closet?
Some small safes include rear or base mounting holes that allow them to be secured. Whether the safe can be bolted safely depends on the product design and the material behind the mounting surface.
Can I install a safe on a closet shelf?
Possibly, but the shelf needs to be suitable for the weight of the safe and its contents. The shelf construction, safe depth, opening clearance and mounting method should all be checked before installation.
Can a safe be built into a wardrobe?
Yes. A built-in closet safe can be integrated into a custom wardrobe when the safe dimensions, cabinet structure, opening clearance, mounting and power requirements are considered during furniture planning.
Does an electronic closet safe need a power outlet?
It depends on the model. Some electronic safes operate on batteries, while others may use external power or a combination of power systems. The exact requirements should be confirmed before the wardrobe is finalized.
Where should a safe be placed inside a closet?
The best position depends on the safe type, supporting structure and frequency of use. Jewelry and watch safes may be more convenient at an accessible height, while larger or heavier safes may require a stronger lower cabinet position.
Should I choose the safe before the wardrobe is built?
For a built-in project, it is usually better to confirm the safe specifications before the wardrobe reaches final production. This allows cabinet dimensions, structural support, opening clearance and power access to be coordinated correctly.
Can a drawer safe be installed inside a walk-in closet?
Yes. A drawer safe can be integrated into custom walk-in closet cabinetry when the cabinet dimensions, structural support, drawer travel, mounting position and power requirements are considered during the design stage.