How to Secure a Safe in a Closet: Mounting, Anchoring and Bolting Guide
A closet safe may look fully integrated once it is installed inside a wardrobe, but visual integration does not automatically mean the safe is physically secured. A product can sit neatly inside a cabinet and still remain a loose object if the mounting points have not been connected to an appropriate supporting structure.
The correct way to secure a safe in a closet starts with the safe itself. Before choosing bolts, anchors or reinforcement, identify the mounting holes designed into the product, review the installation drawing and understand what structure exists behind or beneath the cabinet. A rear hole that lines up with a thin wardrobe back panel, for example, is very different from a rear mounting point that connects through reinforced furniture to a suitable wall.
This is why securing a safe in a closet should be treated as a product-and-furniture coordination task rather than a generic drilling job. The safe manufacturer should provide model-specific mounting information whenever possible, while the installer or furniture contractor evaluates the actual cabinet, wall and floor conditions on site.
How Should a Closet Safe Be Secured?
A closet safe should normally be secured through the mounting holes, brackets or fixing points designed into the product, with those points connected to a suitable supporting structure. Depending on the safe and the installation environment, the mounting direction may be through the base, through the rear panel, through a purpose-built bracket or through a reinforced furniture structure.The important distinction is between the hole in the safe and the structure receiving the fixing. The safe may have a factory mounting hole in exactly the right place, but that does not mean the nearest cabinet panel is automatically strong enough to act as the anchor surface.A proper mounting plan therefore considers four things together: the safe’s designed fixing points, the safe dimensions and weight, the cabinet construction and the material behind the intended anchor position. The appropriate fastener can only be selected after these conditions are understood.
Why Mounting Matters Even Inside a Closet
Many buyers assume that once a safe is placed inside a built-in wardrobe, the surrounding furniture will keep it in position. In practice, a closet can conceal and support the safe without necessarily securing it.A loose safe may move when a heavy drawer is opened, shift during use or remain removable as a complete unit. This is particularly relevant to drawer safes, multi-layer jewelry safes and other products that have moving components.Mounting helps keep the safe stable in its intended position and can reduce the chance of the unit being moved or removed as a loose object. It also helps maintain alignment with the surrounding cabinetry, which matters in high-end wardrobe projects where drawer fronts and panels need to remain visually consistent.However, mounting should not be described as a universal guarantee of burglary resistance. The overall performance of a safe depends on much more than the anchor points alone, including the safe structure, lock design and verified product performance where applicable.
Check the Safe’s Mounting Holes Before Planning the Cabinet
One of the most useful things a buyer or furniture company can do is inspect the actual safe before finalizing the furniture design.Factory-designed mounting holes indicate where the manufacturer expects the product to be secured. These may be located in the base, rear panel or on a dedicated mounting bracket depending on the model.
Base Mounting Holes
Base mounting holes are positioned in the bottom of the safe and are commonly used where the safe sits on a cabinet base, mounting platform or suitable floor structure.For a built-in closet safe, the installer needs to understand what lies below the safe. A decorative furniture base and a structural floor are not the same thing, so the fixing path matters.If the safe is installed inside cabinetry, the mounting hole may pass through the cabinet base before reaching a stronger structural layer beneath it.
Rear Mounting Holes
Rear mounting holes are used where the safe is positioned against a suitable supporting surface.The key question is what sits behind the wardrobe.A thin decorative back panel may only be part of the furniture finish. Behind it there may be empty space, another board, reinforcement or a wall. These conditions need to be identified before choosing the fixing method.
Mounting Brackets or Plates
Some products may use dedicated brackets or mounting plates instead of relying only on holes in the safe body.A bracket can make furniture integration easier because the fixing relationship between the safe and cabinet is more clearly defined. The exact arrangement varies by product, so technical drawings are more reliable than assumptions based on photographs.One important rule is to avoid drilling new holes into the safe body unless the manufacturer specifically approves the modification. New drilling can interfere with internal components, electronic wiring, structural parts or surface finishes.
What Are Anchor Positions?
The terms “mounting hole” and “anchor position” are often used as if they mean the same thing, but they describe two different parts of the installation.A mounting hole is the fixing point provided on the safe.An anchor position is the structure that receives the fixing.For example, a safe may have two rear mounting holes. Those holes may align with a wardrobe back panel, but the actual anchor positions might be reinforced timber, a structural board, a wall or a metal frame behind that panel.This distinction is especially important for custom wardrobes.If the furniture company knows the mounting-hole locations before the cabinet is produced, reinforcement can be positioned where it is actually needed. This is much more effective than completing the wardrobe first and then trying to create support wherever the safe happens to sit.
Does Cabinet Thickness Matter?
Cabinet thickness matters, but it should never be evaluated on its own.A thicker panel is not automatically a structural mounting surface. Material, construction, reinforcement and load direction are equally important.For example, two panels of similar thickness may behave very differently if one is part of a reinforced cabinet frame and the other is only a decorative back panel.
Thin Decorative Back Panels
Thin furniture back panels are often intended to close the cabinet visually rather than act as structural anchors.If a rear safe mounting hole aligns only with this type of panel, the installer should determine whether a stronger structure exists behind it.
Cabinet Bases
A cabinet base may provide more support depending on how it is constructed.For a larger built-in safe, the entire load path matters: the safe body, the cabinet base, the furniture frame and the surface beneath the wardrobe all contribute to how the installation behaves.
Reinforced Cabinet Modules
In custom projects, the cabinet can be designed specifically around the safe.Reinforcement may be incorporated near the mounting positions so the safe and wardrobe work together more effectively. This is one reason early coordination between the safe manufacturer and furniture supplier is valuable.The main point is simple: cabinet thickness should be considered together with material and reinforcement, not used as a standalone indicator of mounting strength.
Can You Bolt a Safe Through a Closet Cabinet?
Sometimes, but the answer depends on the furniture and the structure behind it.A safe may be mounted through a cabinet base into a suitable supporting surface below. In another installation, rear mounting holes may pass through the wardrobe back panel and connect to a stronger structure behind it.A third project may use a dedicated mounting frame integrated into the furniture.All three can look similar once the wardrobe is finished, but technically they are very different.This is why the question should not simply be “Can I bolt the safe through the closet?” A better question is:What structure will the bolt actually connect to after it passes through the closet panel?That is the information that determines whether the proposed anchor position makes sense.
How to Bolt a Small Safe in a Closet
Bolting a small safe in a closet should begin with planning rather than choosing hardware first.
Step 1: Confirm the Safe Dimensions
Record the actual:
Width × Depth × Height
These dimensions affect not only whether the safe fits but also whether the installer can reach the mounting points with tools.
Step 2: Locate the Factory Mounting Holes
Check whether the product uses:
- base mounting holes
- rear mounting holes
- mounting brackets
- another manufacturer-designed fixing system
The product drawing should show these points more accurately than a lifestyle photograph.
Step 3: Inspect the Cabinet Structure
Determine what the safe is sitting on and what exists behind it.
The installer should understand whether the proposed mounting path passes through:
- a decorative panel
- cabinet frame
- reinforcement
- wall
- floor
- mounting plate
Step 4: Confirm the Anchor Position
The anchor position should align with a suitable supporting structure rather than simply the most convenient furniture panel.For a custom project, this alignment can be designed before production.
Step 5: Select the Fixing Method
The actual bolt, anchor or fastener should be selected according to the safe design, the material receiving the fixing and the manufacturer’s recommendations.There is no single fastener that is appropriate for every closet safe.
Step 6: Check Opening Clearance
Before final tightening, confirm that the safe door or drawer can still open fully and that the mounting position has not shifted the safe into contact with surrounding furniture.
Step 7: Check Stability
After mounting, confirm that the safe remains stable in its intended position.Do not apply generic torque values unless the specific product documentation provides them.
Step 8: Test the Safe
Test the complete product, including:
- door or drawer movement
- fingerprint access
- password access
- locking
- backup access
- power
- emergency power if applicable
Testing should happen before surrounding decorative panels are permanently finished.
Base Mounting vs Rear Mounting
Both methods can be appropriate depending on the safe and the installation structure.
| Factor | Base Mounting | Rear Mounting |
| Typical direction | Through safe base | Through safe rear |
| Main requirement | Suitable supporting base | Suitable structure behind safe |
| Furniture access | Base area must be accessible | Rear area must be accessible |
| Common application | Lower cabinet or floor-supported safe | Cabinet against suitable backing |
| Structural review | Required | Required |
Neither method is universally better.
A safe may even be designed to use more than one mounting direction depending on the model. The installation drawing should determine which options are intended.
Should a Closet Safe Be Fixed to Furniture or Structure?
This question is important because furniture fixing and structural anchoring are not automatically the same thing.
Furniture Fixing
Furniture fixing means the safe is secured primarily to the cabinetry.This may be appropriate where the cabinet has been specifically reinforced and designed around the safe.
Structural Fixing
Structural fixing means the safe connects to a suitable wall, floor or another structural support beyond the decorative furniture.This arrangement requires the installer to understand what lies behind the cabinet.
Combined Fixing
Some projects may combine furniture integration with structural anchoring.For example, the cabinet positions the safe and provides the finished appearance while the fixing continues through the cabinet into another supporting structure.The correct approach depends on the project rather than on a universal rule.
Securing a Built-In Closet Safe
A built-in closet safe can look completely integrated with the wardrobe, but the word “built-in” describes how the product fits into the furniture rather than how it is physically secured.The safe may still require dedicated mounting.For a new wardrobe project, the best time to plan this is before the furniture reaches final production. The safe manufacturer can provide mounting-hole positions and product dimensions, while the furniture company can determine where reinforcement or access should be provided.
This allows the wardrobe to be designed around:
- safe dimensions
- mounting positions
- opening clearance
- power
- emergency access
- installation access
Once the safe has been mounted and tested, the surrounding panels and trim can be completed.
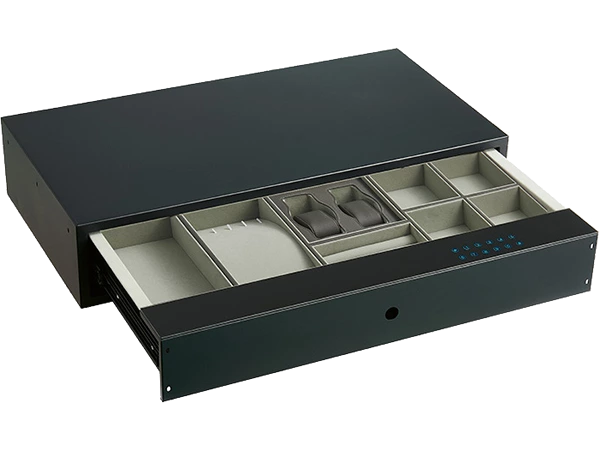
Securing a Drawer Safe in a Closet
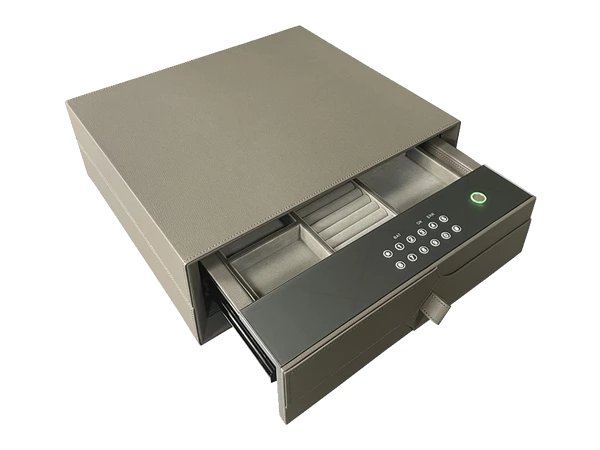
Drawer safes require additional attention because the product contains moving rails and a drawer mechanism.Mounting points should remain separate from the moving components unless the product is specifically designed otherwise.The safe body needs stable support inside the cabinet while the drawer must still extend completely.
When planning the installation, check:
- body support
- mounting-hole locations
- rail position
- full drawer travel
- front clearance
- fingerprint or keypad access
- power connection
- emergency access
A real mounting drawing is particularly valuable for this type of product because it shows where the fixed body ends and where the moving components operate.For furniture companies, this information helps prevent mounting screws or reinforcement from interfering with the drawer rails.
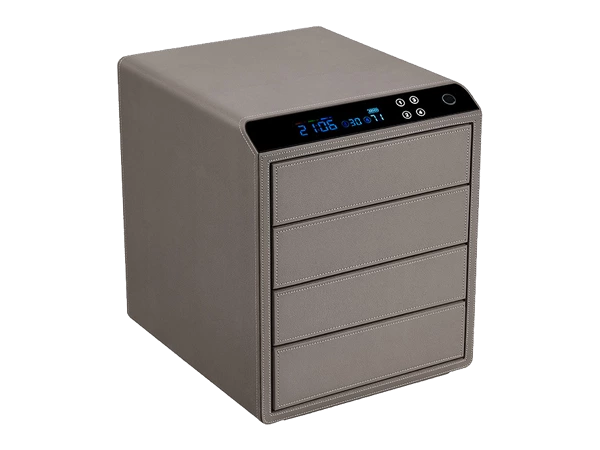
Securing a Multi-Layer Jewelry Safe
Multi-layer jewelry safes are generally larger than a compact drawer safe and may contain several drawers or storage sections.The furniture should therefore be designed around both the physical size of the safe and its operating movement.The supporting base needs to be evaluated, and rear or base mounting positions should align with suitable structure.For electronic models, power and emergency access should also remain available after the product is fixed in place.Because these products can vary greatly in size and configuration, specific safe weights or structural requirements should come from the actual model documentation rather than generic assumptions.
How Product Dimensions Affect Mounting
Product dimensions are important for more than cabinet fit.They determine where the safe sits relative to the cabinet frame, whether the mounting holes line up with reinforcement and whether the installer has enough access to reach the fixing points.
A useful technical drawing should show:
Safe Width × Depth × Height
together with:
- mounting-hole positions
- distance from mounting holes to product edges
- drawer or door travel
- power position where relevant
For custom furniture projects, this information can be sent directly to the wardrobe company before production.A dimensioned drawing provides far more installation value than a white-background product image alone.
Why Installation Drawings Matter
For a built-in closet safe, the installation drawing is often one of the most useful documents in the entire project.Furniture companies need to know more than the outer size of the safe. They also need to understand where mounting points, moving components and power connections are located.
A good installation drawing may show:
- external dimensions
- mounting-hole positions
- mounting-hole quantity
- hole dimensions where verified
- drawer extension
- door swing
- rear clearance
- power connection
- emergency access
- cable route
- recommended cabinet opening where applicable
This allows the safe and furniture to be coordinated before manufacturing.For B2B projects, installation drawings can also reduce communication errors because the technical relationship between the safe and cabinet is shown visually rather than described only in text.
What Should an Installation Drawing Include?
At minimum, a useful drawing should identify the product clearly and show its main dimensions.
External Dimensions
Width, depth and height should correspond to the exact model.
Mounting-Hole Positions
These should be dimensioned from defined product edges wherever possible.
Mounting-Hole Quantity
Only publish verified information for the actual model.
Opening Movement
For a drawer safe, show full drawer travel.
For a door safe, show the opening direction and any relevant clearance.
Power Position
Electronic safes should show the actual location of power connections where this information is available.
Emergency Access
If a backup keyhole or emergency power point affects the furniture design, it should also be considered.
Manufacturer Mounting Notes
Model-specific notes should be included where relevant rather than replaced with generic installation advice.
Cabinet Thickness and Reinforcement Considerations
Cabinet construction deserves more attention than it usually receives in basic online advice.The furniture material may include wood, engineered board, plywood, metal framing or other structures, and each behaves differently.Panel thickness matters, but reinforcement and frame design can be equally important.For example, a furniture designer may choose to create a stronger cabinet base or add reinforcement around the safe’s mounting positions. The appropriate design depends on the actual safe and furniture system.The safe weight should also be considered, particularly for drawer models where the load moves forward as the drawer opens.For this reason, a cabinet should not be evaluated only by asking, “How thick is the panel?” A more useful question is:How is the cabinet constructed around the safe and where does the load transfer?
Can You Mount a Safe on a Closet Shelf?
Possibly, but the shelf needs to be designed for the safe rather than assumed to be suitable.
Before using a shelf location, check:
- shelf construction
- supporting structure
- safe weight
- available depth
- mounting-hole alignment
- anchor path
- drawer or door clearance
A standard wardrobe shelf used for folded clothes or handbags should not automatically be treated as a safe mounting platform.If a shelf installation is required, the furniture supplier should review the supporting structure and coordinate it with the safe mounting design.
Should You Bolt the Safe Before or After Cabinet Installation?
The correct sequence depends on the furniture design, but mounting access should be planned before surrounding panels are permanently closed.A typical built-in project may follow this sequence:Safe position → Mounting access → Safe fixing → Functional testing → Final furniture finishingThe safe does not necessarily need to be mounted before every cabinet component is installed. The key is to make sure the installer can still reach the fixing points.After the safe is mounted, test the product completely before decorative trim, drawer fronts or concealment panels are finalized.
Can You Drill New Mounting Holes Into a Safe?
Not unless the manufacturer approves the modification.A safe body may contain far more than visible sheet metal.
Depending on the product, internal areas may contain:
- wiring
- lock components
- reinforcement
- rails
- electronic modules
- finished interior materials
Drilling into an arbitrary location can damage these components or alter the safe structure.It can also affect the exterior finish and potentially interfere with warranty conditions.The safer approach is to use the mounting points designed into the product or request a custom mounting arrangement before production if the project requires something different.
What Fasteners Should Be Used?
There is no universal anchor bolt that should be recommended for every closet safe.
The correct fastener depends on:
- safe mounting-hole design
- anchor position
- wall material
- floor material
- cabinet construction
- reinforcement
- manufacturer guidance
A fixing that works in one type of structural material may be inappropriate in another.For this reason, the safe manufacturer should provide product-specific mounting information while the installer evaluates the actual site structure and selects the appropriate fixing system.
Securing a Smart or Electronic Closet Safe
Smart safes require all the same structural planning as conventional safes, with several additional considerations.Power cables should not pass through areas where they can be damaged by the fixing process.Emergency power connections should remain reachable.If the model includes a backup key, the key access point should not be covered permanently by furniture.Drawer safes also require particular attention to rail movement. Mounting positions, cables and reinforcement should not interfere with the sliding mechanism.The electronic functions should be tested after the safe is mounted because small changes in alignment can affect how smoothly the drawer or door operates.
Common Closet Safe Mounting Mistakes
Several installation problems appear repeatedly in custom wardrobe projects.
Fixing Only to a Thin Back Panel
The safe may appear mounted even though the panel itself is not an appropriate anchor structure.
Ignoring Factory Mounting Holes
Creating a different fixing position can introduce unnecessary risk.
Drilling Arbitrary Holes Into the Safe
This may damage internal components or alter the product structure.
Mounting Before Checking Door Clearance
The safe can end up perfectly fixed but unable to open correctly.
Blocking Emergency Access
Backup keys and emergency power should remain reachable.
Forgetting Power Before Bolting the Safe
This is a common problem with electronic models.
Interfering With Drawer Slides
Fixing points and reinforcement should not block the moving mechanism.
Finishing the Cabinet Before Testing
This makes corrections much more difficult.
Assuming Weight Alone Is Enough
A heavy safe may still require appropriate mounting depending on the product and installation.
Manufacturer Recommendations Before Securing a Safe
Before installation begins, several pieces of information should be confirmed.First, identify the exact model. Similar-looking safes may have different mounting-hole locations or internal structures.Next, confirm the external dimensions and product weight if this information is available.
Then review:
- mounting-hole positions
- intended mounting direction
- cabinet material
- cabinet thickness
- reinforcement
- surrounding wall or floor structure
- opening clearance
- power location
- emergency access
- installation drawing
For a custom furniture project, these details should ideally be shared with the wardrobe company before production reaches the final stage.The safe manufacturer can explain how the product is designed to be mounted, while the furniture company or installer determines how that mounting design should interact with the actual structure.
What Information Should You Send the Safe Manufacturer?
If you are planning a built-in or custom closet safe, provide as much project information as possible.Start with the safe model if it has already been selected.
Then provide the available cabinet dimensions:
Width × Depth × Height
A wardrobe drawing is strongly recommended because it shows where shelves, panels and other drawers are located.
Also provide:
- cabinet material if known
- cabinet thickness if known
- proposed installation position
- wall or floor information where relevant
- preferred mounting direction
- available power
- photographs of an existing closet if the furniture is already installed
For B2B or furniture projects, this information allows the manufacturer to review whether the selected safe configuration is appropriate before production.
Closet Safe Securing Checklist
Before installation, confirm the technical information rather than relying only on the finished appearance.
Before Installation
- Confirm exact safe model
- Confirm product dimensions
- Locate factory mounting holes
- Review installation drawing
- Inspect cabinet construction
- Identify intended anchor structure
- Check door or drawer clearance
- Confirm power requirements
- Confirm emergency access
During Installation
- Position the safe correctly
- Use the designed mounting points
- Avoid interference with drawer rails or other moving parts
- Keep power and emergency access clear
- Protect the surrounding furniture
After Installation
- Check safe stability
- Open and close the drawer or door completely
- Test fingerprint access
- Test password access
- Test the locking system
- Test backup access
- Confirm power operation
- Check final alignment with the cabinetry
Manufacturer Insight: Mount the Safe to the Structure, Not Just the Furniture Finish
One of the most important lessons in closet safe projects is that the visible cabinet surface does not always tell you what is actually supporting the safe.A mounting hole may line up neatly with a wardrobe back panel, but the installer still needs to understand what that panel is made from, how thick it is, whether it is reinforced and what exists behind it.This is why mounting should ideally be planned during the furniture design stage.If the safe manufacturer provides the mounting-hole positions before cabinet production, the furniture company can place reinforcement where it is genuinely useful. The cabinet opening, installation height, drawer clearance and power route can all be coordinated at the same time.From a manufacturing perspective, the most reliable closet safe installation starts with the safe’s actual mounting design and the real structure around it—not with a generic bolt recommendation.
FAQ
How should a closet safe be secured?
A closet safe should be secured using the mounting holes or brackets designed into the product and connected to a suitable supporting structure. The correct method depends on the safe design, cabinet construction and the wall or floor material behind the mounting position.
Should I bolt a safe inside a closet?
Bolting may be appropriate when the safe is designed for it and a suitable anchor structure is available. The manufacturer’s mounting design should be followed rather than assuming the wardrobe panel itself provides sufficient support.
Can I bolt a small safe to a closet shelf?
Only if the shelf and its supporting structure are suitable for the safe’s weight and mounting requirements. A standard wardrobe shelf should not automatically be assumed to be appropriate.
What are mounting holes on a safe?
Mounting holes are factory-designed fixing points used to secure the safe. Depending on the model, they may be located in the base, rear panel or a mounting bracket.
What is an anchor position?
An anchor position is the supporting structure that receives the fixing from the safe. It may be a suitable wall, floor, reinforced cabinet or mounting frame. It is different from the mounting hole in the safe itself.
Does cabinet thickness matter when securing a safe?
Yes, but thickness alone does not determine whether the cabinet is suitable. Material, reinforcement, panel construction and the supporting structure behind the cabinet also matter.
Does a built-in closet safe still need mounting?
A built-in appearance does not automatically secure the product. Depending on the model and project, proper mounting or anchoring may still be required.
Can I drill new mounting holes into a safe?
Do not drill new holes unless the manufacturer specifically approves the modification. Unplanned drilling can affect internal components, structure, finish or warranty conditions.
Should the safe be secured before the cabinet is finished?
In many built-in projects, mounting and functional testing should be completed before surrounding trim or decorative panels are permanently installed.
What should I ask the manufacturer before installing a closet safe?
Ask for the exact product dimensions, mounting-hole positions, installation drawing, opening clearance, power location and any model-specific mounting recommendations.